Quick Facts
Robust and easy-to-grow houseplant
1
Vibrant blooms in spring and summer
2
About 45cm (18in) tall by 30cm (1ft) wide
3
Position in bright, indirect light
4
Water regularly from spring to autumn, keep cooler and drier in winter
5


Before you get started
What are clivias?
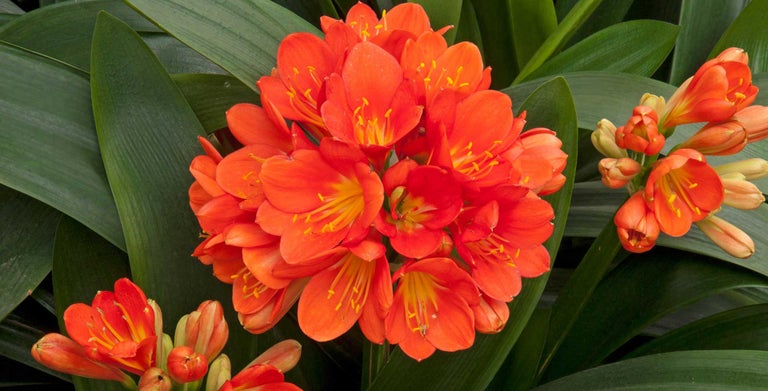
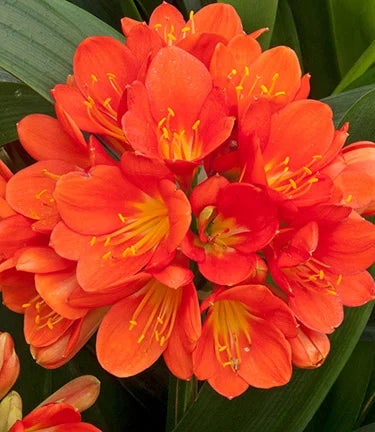
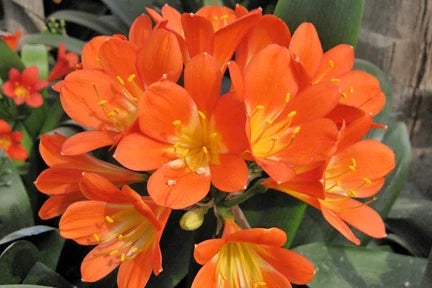
Clivias are tender bulbous perennials from South Africa that produce a spectacular display of flowers in spring and summer. Sometimes known as Natal lilies, they’re popular as houseplants, as they’re easy to grow and resilient, and they tolerate low light. The fragrant, trumpet-shaped or tubular blooms come in various colours, from cream and pale yellow to vibrant orange and red. They’re held in a cluster on top of a sturdy stem, up to 45cm (18in) tall, above a fountain on long, leathery, evergreen leaves.
Clivias can also be moved outdoors for the summer in the UK, to add a tropical look to a warm, sheltered spot in light shade.
Choosing clivias
There are three species of clivia with an RHS Award of Garden Merit (AGM), which shows they performed well in RHS houseplant trials, so are reliable choices for your home:
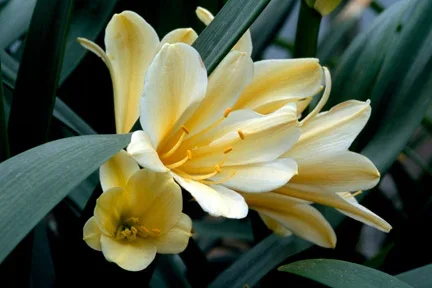
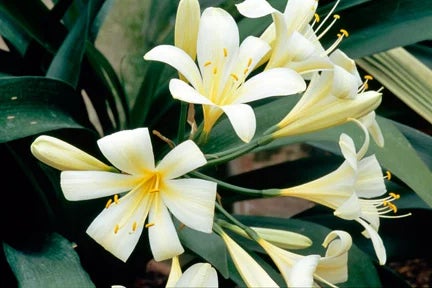
- Clivia miniata AGM – the most widely available species, with orange funnel-shaped flowers that have a yellow throat
- Clivia miniata var. citrina AGM – pale lemon-yellow trumpet flowers up to 7cm (3in) long
- Clivia nobilis AGM – with curved, tubular red-and-yellow flowers with green tips
Buying clivias
Clivias can sometimes be tricky to track down, but may be available in the houseplants section of large garden centres, especially in spring and early summer when in flower. For tips on choosing good quality plants, see our guide to buying from garden centres. Clivias are also available online from houseplant and tropical plant suppliers, including RHS Plants. See our guide to buying by mail order.
Clivia seeds are sometimes available from larger seed stockists, but the resulting plants take several years to reach flowering size. (See Propagation, below.)
Planting
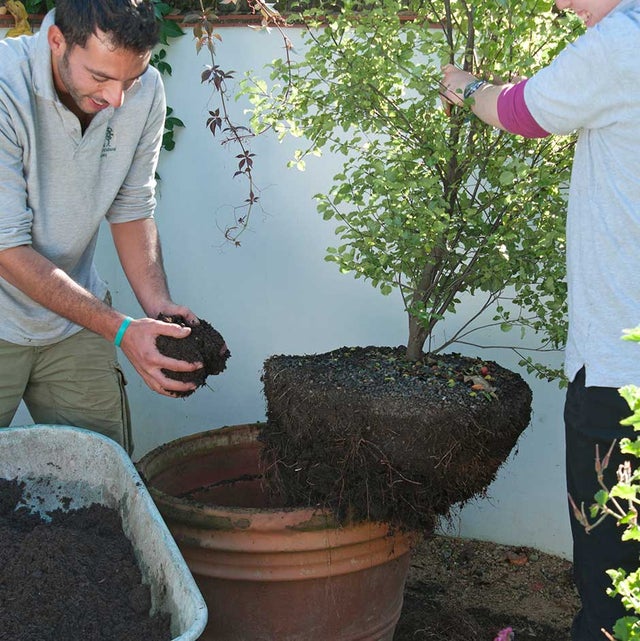
Clivias can be kept in their original container for several years. They are generally slow growing and often flower better when their roots are a little crowded, as they dislike being disturbed. However, they do usually need re-potting every three to five years, once the roots are tightly packed or are starting to come out of the drainage holes. This is best done in early spring:
- Wear gloves when handling clivias, as the may irritate skin
- Choose a container that’s just a few centimetres larger than the old one, to avoid overpotting, as this can deter flowering
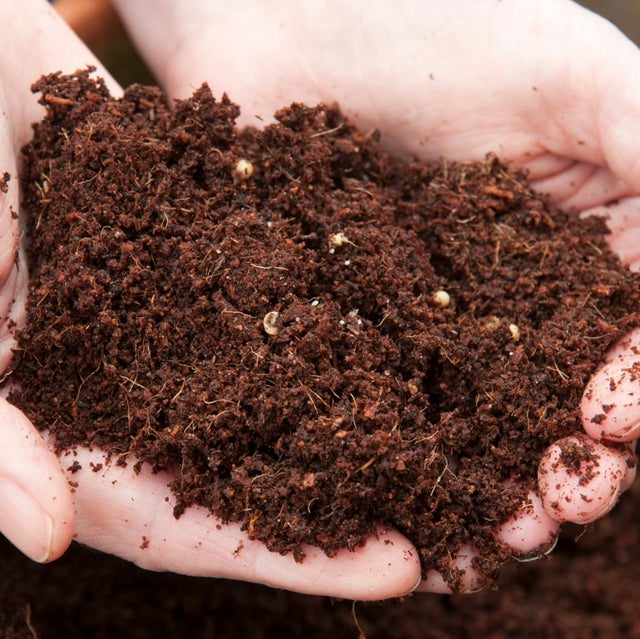
- Use a mix of peat-free loam-based John Innes No 2 , peat-free multi-purpose compost, grit and leafmould
- Position the plant at the same depth as previously, with the ‘neck’ (from where the leaves sprout) protruding above the compost
Also see our guides:
Ongoing Care
Location
- Place clivias in bright, filtered or indirect light. Avoid direct sun in summer, as it can scorch the leaves
- Keep plants away from radiators and other heat sources, and out of cold draughts
Over winter, move clivias to a cool or unheated room, at about 10°C (50°F). An enclosed porch, cool hallway, or a conservatory, greenhouse or similar, might also suit. This mimics the winter conditions in the plant’s South Africa, and stimulates it to start flowering in spring.
Clivias can also be moved outdoors over the summer months, after hardening off, into a warm, sheltered spot. Keep them out of direct sun. They can usually cope down to 5°C (41°F), so bring them back indoors in late summer or early autumn, before night temperatures fall too low.
Watering
- In spring – gradually increase watering as the flower buds develop
- In summer and autumn – water regularly
- In winter – water sparingly, but never let the dry out completely
Always take care not to overwater clivias, as the roots can rot in soggy compost, especially over winter. A drier spell in winter helps to initiate flowering.
Feeding
To boost growth and flowering, you can feed weekly with a general liquid houseplant fertiliser throughout spring.
Also, top-dress containers annually in early spring – remove the top layer of compost and replace with fresh potting compost.
Encourage flowering
- Clivias flower best when well established in a container that’s at least 20cm (8in) in diameter
- In winter (November to February), move your clivia to a cool but bright spot, at about 10°C (50°F). Water sparingly, but don’t let the compost dry out
- In March, move it back into a well-lit position, at about 16°C (60°F), and increase watering. Keep the compost just moist, but never . Apply a balanced liquid houseplant feed weekly until flower buds form
Deadheading
Once all the flowers in the cluster have faded, remove the whole flower stem at the base. It’s best to wear gloves for this, as the can irritate skin.
Pruning and Training
Apart from deadheading and removing fading leaves, no other pruning or training is required.
Propagating
You can make new plants by dividing a thriving clump after flowering and by sowing seeds.
By division
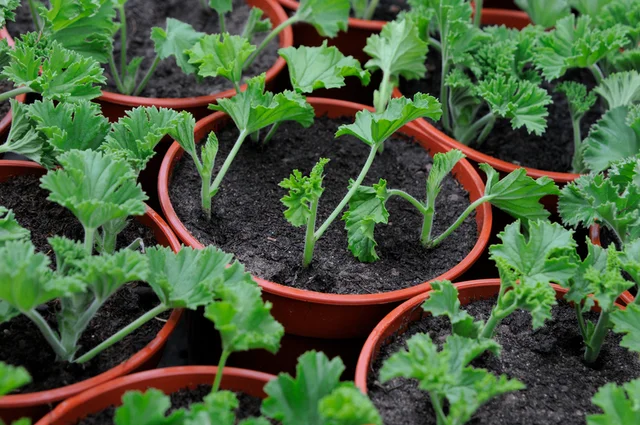
Over time, clivias naturally produce new young plants, or offsets, around the base. These can be detached and potted up separately in spring and summer:
- Tip the plant out of its pot and wash the away from the fleshy roots. Take care, as the roots are easily damaged
- Gently pull the smaller plants away, if possible, rather than cutting them off, as this does less damage
- Plant each of the offsets into its own small pot. This should be just large enough to accommodate the roots. Take care not to overpot into too large a container
- Keep at about 16°C (60°F) in bright, indirect light
- Water well and mist the foliage until they are well rooted and producing new leaves
The new plants should flower in a couple of years.
By seed
When clivias are grown indoors, their flowers won’t usually get and even though plants may form red fruits, the seeds inside won’t be viable. To remedy this, hand-pollinate with a paintbrush, transferring pollen between the flowers. Or move flowering plants outside to a warm, shady spot, to be pollinated naturally.
Pollinated flowers will form berries containing large seeds. Once the fruits are ripe, remove the seeds – see our guide to collecting seeds.
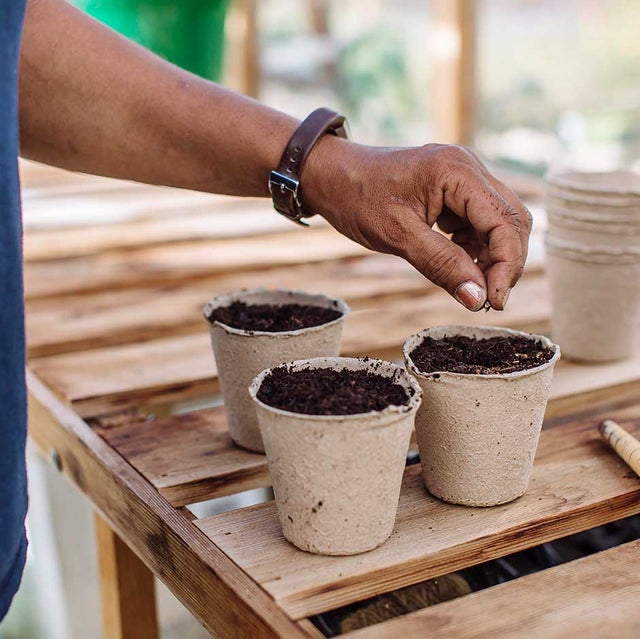
Sow immediately, without allowing the seeds to dry out:
- Fill small pots with peat-free loam-based , such as peat-free John Innes No 1, and press one seed into the centre of each
- Water lightly to moisten the compost
- Stand the pots in a warm place, ideally in a , at about 21°C (70°F). Water sparingly to keep the compost slightly moist but not soggy
- should appear in six to eight weeks. Water regularly and keep at 16°C (60°F)
The new plants should flower in three to four years – flower colours may vary from the parent plants.
Problems
Clivias are generally robust and trouble-free when grown in the correct conditions. However, when plants aren’t entirely happy, a few problems may arise.
Lack of flowers may be due to:
- Plants being in a container that is too large – see how to avoiding overpotting
- Too warm in winter – keep at about 10°C (50°F) from November to February
- Insufficient water when in active growth – this can cause the leaf tips to turn brown and prevent flowering
- Plants being too young – they take several years to reach flowering size
Flowers on short stalks, hidden among the leaves, may be caused by:
- Being too warm in winter – keep at 10°C (50°F) from November to February
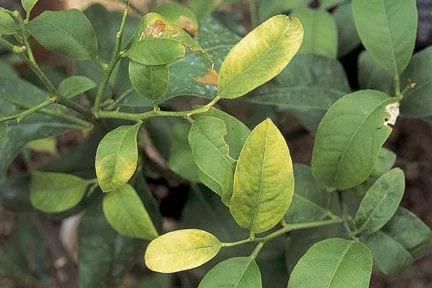
Yellowing foliage may be due to:
- Lack of – apply a general houseplant feed regularly in spring and summer
- Overwatering and waterlogging – to revive a plant after a spell of waterlogging, remove it from its pot and cut off any dead or rotten roots. Remove any sour, and replace with fresh. Adjust watering so the compost is slightly moist but not soggy, and reduce watering in winter
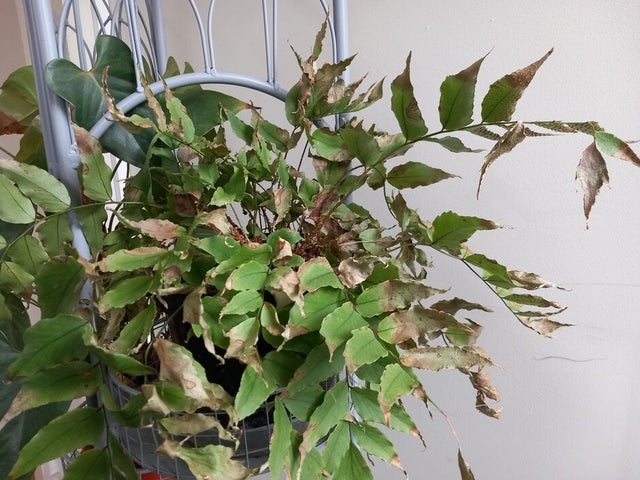
Brown patches on leaves may be due to:
- Scorching in direct sun – this can happen in summer when light is refracted through a window or through water droplets on the leaves
Tufts of white, waxy wool on the leaves:
- a tell-tale sign of -feeding mealybugs