Apples and pears: starting a new cordon

Cordons are usually compact, single-stemmed plants, so are a good option for growing fruit in a small space. When starting a cordon from scratch, it needs initial pruning and training after planting so it forms the correct shape.

Prune after planting to create the typically narrow cordon form ©Tim Sandall / RHS

Quick facts

  • Great for small gardens and for growing in containers
  • You can buy pre-trained cordons or start one from scratch
  • Choose a spur-bearing cultivar grafted onto a dwarfing rootstock
  • Unless growing a self-fertile cultivar, a pollinating partner tree is needed
  • Usually single stemmed, trained either at 45° or vertically
  • Initial pruning, when starting from scratch, is vital to create the correct shape
  • Needs a permanent support
  • Annual pruning is essential to retain the shape

Before you start

Discover what cordons are and how to choose a suitable tree for training in this way.

What are cordons?

A

cordon is a compact way of growing fruit, ideal if you don’t have room for a full-sized tree, if you want to grow fruit in containers, or if you want several different cultivars in a small area.
 
They are attractive features and make productive use of bare walls or fences. They can be planted closely, as little as 60cm (2ft) apart.
 
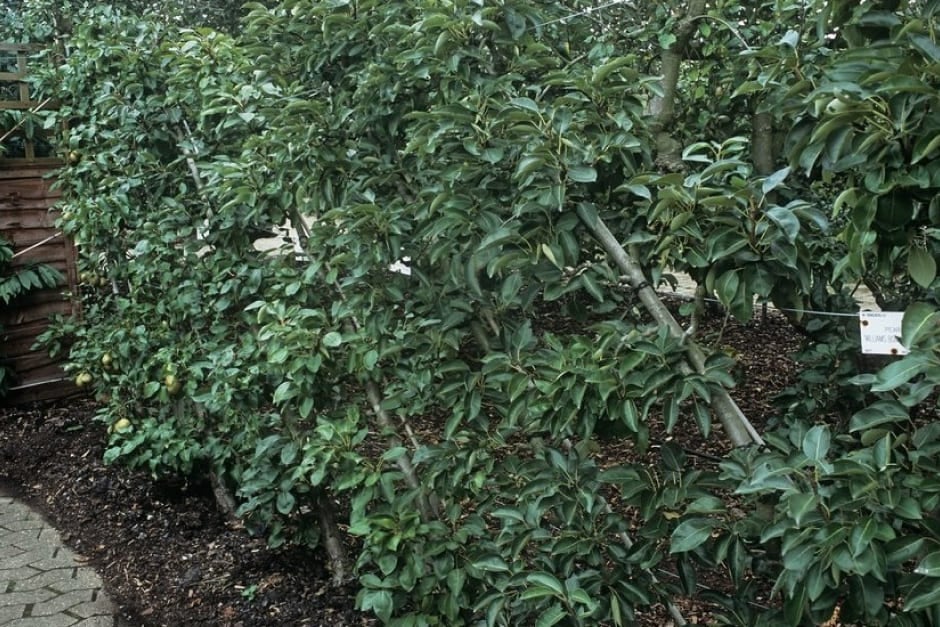
Cordons are usually trained as a single stem with very short side-shoots that carry the fruit. There are several popular forms:

  • Oblique cordons – a single stem trained at a 45° angle
  • Vertical cordons – either a single stem or multiple stems, supported vertically. Single-stemmed forms include Minarette®, Supercolumn and Ballerina® (see What to buy below), while multi-stems are either U cordons (with two stems) or double-U (with four)
  • Horizontal cordons – are usually known as a stepovers. See our guide to growing stepovers for full details.

Cordons need pruning annually in late summer. This is easier to manage than on larger trees, but must be done consistently every year. Harvesting is also simple as the fruits are within reach.

Oblique cordons can be grown close together in a small area  ©RHS/Tim Sandall

Vertical versus oblique cordons

Oblique cordons:

  • Usually more productive than vertical cordons, as training the stem at 45° reduces the dominance of the topmost shoot (known as apical dominance) and diverts energy into fruiting
  • Less likely to become overly vigorous (for the same reasons as above)
  • A single plant needs more width-space, but you can grow several different cultivars closely side-by-side
 Vertical cordons:
  • Take up less width-space, but tend to fruit slightly less well than oblique cordons, and maintaining the shape may be more difficult, due to apical dominance
  • Regular pruning is essential to prevent the top part becoming dominant, turning into its natural ‘tree shape’
  • Multi-stemmed vertical cordons (U or double-U cordons) are easier to manage – having multiple stems reduces vertical dominance, so plants tend to stay well balanced
  • Double-U vertical cordons are particularly suitable for growing in containers, offering an attractive shape and extra fruit
  • Vertical cordons can be trained over an arch support, creating an eye-catching feature
  • Single-stemmed vertical cordons can potentially reach well over 3m (10ft) if the main stem is left unpruned. However, this can be useful when training over arches


Vertical cordons can be planted either side of a path and trained over arches  ©RHS/Tim Sandall
 

Choosing what to buy

You can buy either pre-trained cordons or one-year-old trees to train yourself from scratch.

Pre-trained cordons

They re the easiest option and will fruit sooner than if you train from scratch, saving you time.

  • Buy a two-year-old plant to grow as a single-stemmed vertical or oblique cordon
  • Minarette®, Supercolumn are conventional apple and pear cultivars that have been carefully pre-trained to form well-branched vertical cordons. They need regular summer pruning to keep their shape
  • Ballerina®, on the other hand, is a series of apple cultivars that have a natural columnar shape and need little or no pruning. But although they look attractive, they tend to be disease prone and the fruit may have less flavour than many conventional cultivars
  • With multi-stemmed vertical cordons, starting with a pre-trained tree can give you a head-start of up to four years (for a double-U cordon)
  • Your main choice is which cultivar to buy – see our guide to apple cultivars and our guide to pear cultivars
  • Pre-trained cordons are mainly available from fruit tree nurseries online, although larger garden centres may stock a limited selection
Pre-trained cordon   ©RHS/Tim Sandall

Buying: mail order plants

Buying: mail order plants

Buying: trees and shrubs

Buying: trees and shrubs

 
Training cordon from scratch
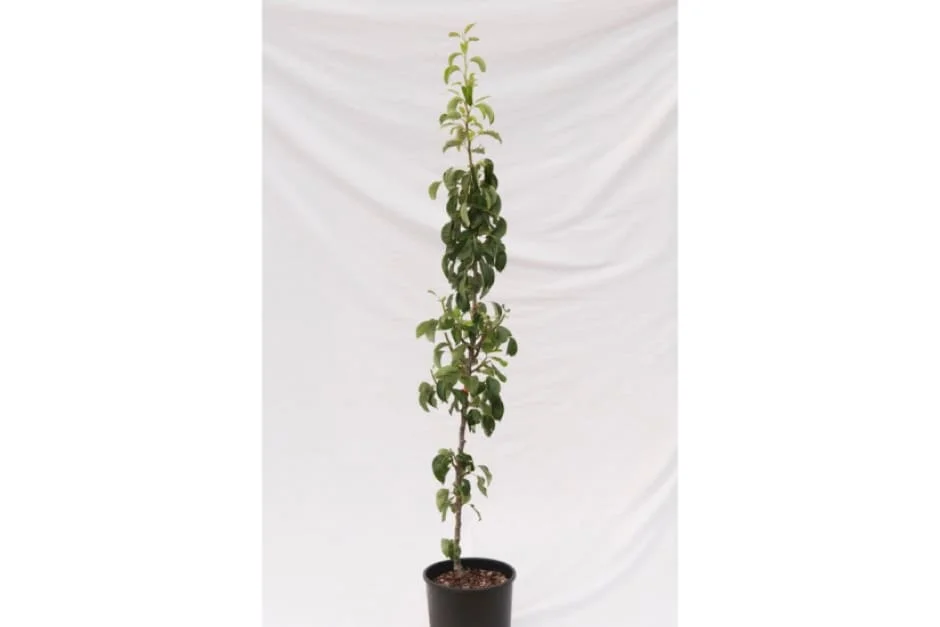
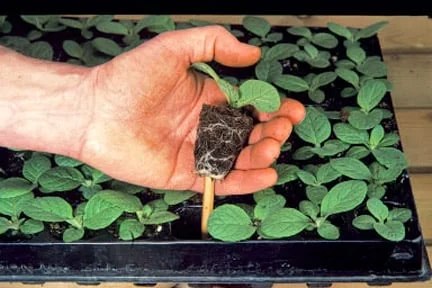
When starting cordon form scratch buy a one-year-old tree, known as a maiden. These are cheaper than pre-trained cordons and mainly available online from fruit nurseries. However, you need to choose your tree carefully to make a successful cordon.
 
Apple and pear trees are sold as grafted plants, comprising a rootstock (which controls the plant’s size) and a cultivar (which forms the upper part). It’s important to buy a tree that combines a rootstock and cultivar that are both suitable for this style of training.
 
Rootstock choice – trees must have a dwarfing rootstock to keep them compact:
  • M9 for apples – dwarfing, well suited to cordon training
  • M26 for apples – dwarfing, useful for cordons growing in poor soil
  • Quince C and Quince Eline for pears – semi-dwarfing, best for cordon training
Cultivar choice – the cultivar forms the upper part of the cordon. Different cultivars carry their fruit in different ways – check the plant’s label or online description to make sure you buy a type suitable for cordon training:
  • Spur-bearers are best suited for cordon training, as they carry their fruit on short side-shoots known as spurs
  • Partial tip-bearers may be trained as cordons, although some are more challenging to maintain than others – see FAQs below.
  • Tip-bearing cultivars are not suitable for cordon training
You will need another compatible cultivar in your own or a neighbour’s garden (from the same pollination group) to ensure a good crop – see our guide to fruit pollination for more details.
 
For more on cultivar choices, see our guide to apple cultivars and our guide to pear cultivars

How to support a cordon

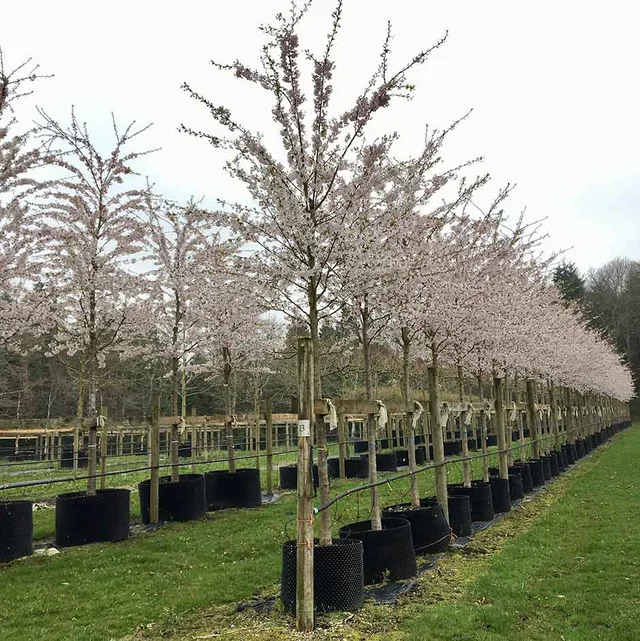
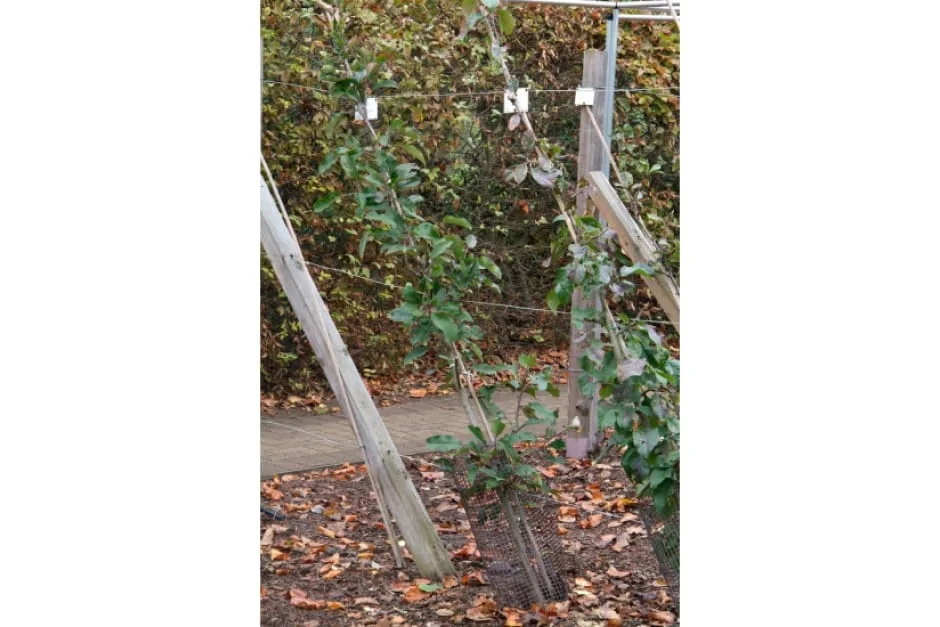
Cordons need permanent support, which should be put in place before planting. Oblique cordons are generally kept at 1.5–2m (5–6½ft) tall. Vertical cordons can potentially reach well over 3m (10ft), but can be kept at 2.4m (8ft) or less, so bear that in mind when choosing your planting site and supports. 

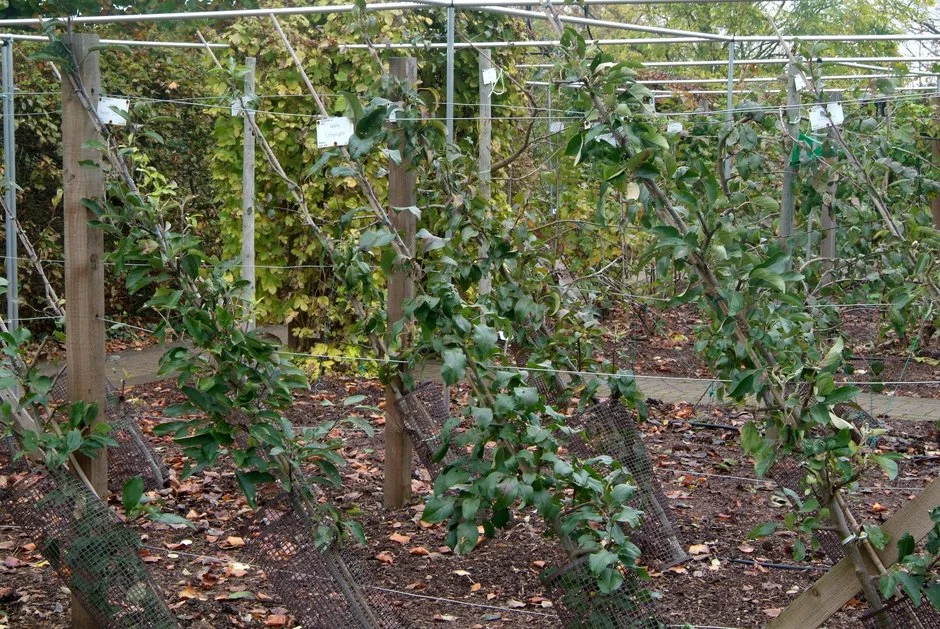
The traditional support system, especially for oblique cordons or if planting several vertical cordons, is a series of three horizontal wires 60cm (2ft) apart, with the lowest wire 30cm (1ft) from the ground. These can be attached to a fence or wall, or to 1.8m (6ft) sturdy posts spaced 2–3.5m (7–12ft) apart. The rows should ideally run from north to south, with oblique cordons inclined towards the north, for maximum light penetration.  
If using free-standing end posts, anchor them firmly in the ground and add a bracing support on the inner side at a 45° angle, to keep the posts vertical when the wires are tightened (see photo below). 
 
Use strong galvanised wire (ideally 2.5mm, gauge 12), plus straining bolts to keep it taut. If attached to a wall or fence, the wire should be held at least 10cm (4in) away from the structure to allow for air circulation. 

Other support options include strong trellis or tall, firmly anchored tree stakes.

Support cordons on a series of three horizontal wires, between posts or attached to a wall or fence  ©RHS/Tim Sandall​
 
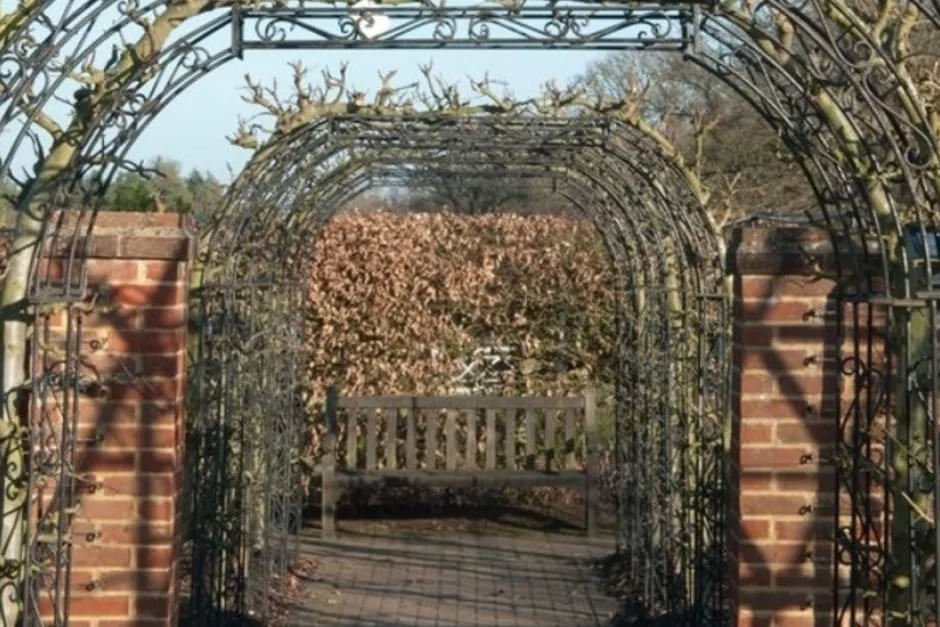
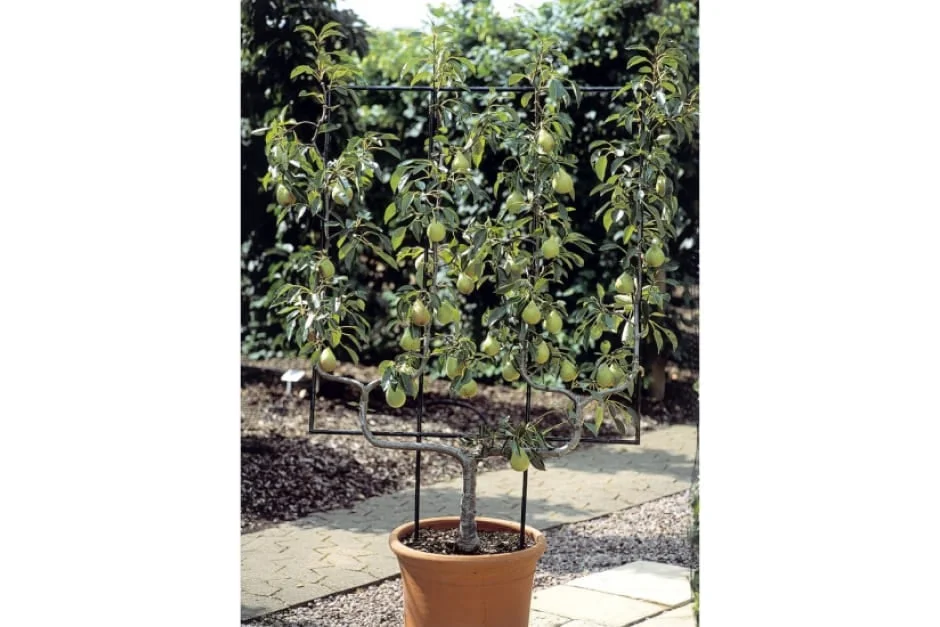
Vertical cordons can also be supported against sturdy posts, a pergola or similar permanent structure, or trained over an archway or arbour.
 
Container-grown cordons can be grown either free-standing or against a wall/fence. If free-standing, sturdy bamboo canes are sufficient support, as the trees are usually much less vigorous than if planted in the ground.
Use a small trellis or bamboo canes to support a double-U cordon in a pot   ©RHS/Tim Sandall

How to plant a cordon

Apple and pear trees are best planted from late autumn to early spring, while dormant. Planting is easy – see our step-by-step guide to planting a tree and our video guide to planting trees.
 
When planting an oblique cordon:

  • Position the tree so the stem leans at an angle of 40–45°
  • If planting more than one, space them 60–90cm (2–3ft) apart – the wider spacing is better when planting in infertile, shallow or sandy soil
  • Support the main stem – if using horizontal wires, fix a 3m (10ft) bamboo cane to the wires diagonally at a 40-45° angle, then tie the stem to it in several places using garden twine and a figure-of-eight knot
 When planting a vertical cordon:
  • Tie the main stem to a sturdy vertical support in several places with a figure-of-eight knot
  • If planting more than one, space them at least 60cm (2ft) apart – close planting (60–80cm/24–32in) helps to restrict vigour
  • Vertical cordons grow well in containers too – see our guide to growing trees in containers for planting details
Top tip

When planting apple and pear trees, make sure the graft union – the visible bump on the lower part of the stem – remains well above the soil surface.

How to prune a new cordon

Prune an untrained one-year-old tree (maiden) straight after planting in winter:
  1. Cut back any side-shoots (laterals) that are longer than 10cm (4in) to three or four buds. Leave any shorter side-shoots unpruned

  2. On an oblique cordon, leave the main stem (leading shoot) unpruned. On a vertical cordon, encourage branching by shortening the previous season’s growth on the main stem (the leading shoot) by one-third each winter until it reaches the top of the support

Also note that:

  • Pre-trained trees should have already been pruned in this way (but do check), so no initial pruning should be required. Instead, start with First summer pruning, see below

  • Ballerina® apple trees grow naturally into a columnar shape – they don’t require any pruning at planting time

First summer pruning

In the first summer after planting, prune cordons when the new shoots have turned woody in their lower third – usually from late-July for pears and mid- to late-August for apples – as follows:


  1. On existing side-shoots (that were pruned in the first winter), cut back this year’s new growth to one leaf beyond the basal cluster (the closely growing cluster of leaves at the base of the current season’s shoots - see branch detail digram below marked no 4). You’re essentially pruning any new growth to 2.5–5cm (1–2in) stubs that will form the fruiting spurs

  2. Look for any new side-shoots that have grown earlier in the summer directly from the main stem. Cut them back to three leaves beyond the cluster of leaves at their base

  3. Leave the main stem (leading shoot) unpruned and tie in its additional growth to the support

    Summer pruning of vertical cordon, step 1 and 2  ©RHS/Chris Lane 
Subsequent summer pruning

Cordons require summer pruning every year, to keep them compact, in good shape and fruiting well. See our guide to summer pruning of established cordons
 
Only Ballerina® trees don’t require routine annual pruning.

Frequently asked questions

How can I encourage more branching from the main stem?
On a young tree, try ‘tipping’ in winter. This means pruning back the previous summer’s growth at the top of the main stem by up to one-third. Winter tipping should induce some of the lower buds to break in spring
 
How can I train a partial tip-bearers as a cordon?
Although it’s best to use spur-bearing cultivars, it is also possible to train partial tip-bearers as cordons. Some, such as ‘Discovery’ and ‘Charles Ross’, are easily maintained, but others, such as ‘Worcester Pearmain’ and 'Bramley's Seedling', can potentially be difficult to manage. The key difference when summer pruning is to leave several shorter new shoots, about a secateur’s length (20cm/8in) or less, unpruned every year. These shorter shoots are likely to have developed a fruit bud at the tip.
 

Join the RHS

Become an RHS Member today and save 25% on your first year

Join now

Gardeners' calendar

Find out what to do this month with our gardeners' calendar

Advice from the RHS

Get involved

The Royal Horticultural Society is the UK’s leading gardening charity. We aim to enrich everyone’s life through plants, and make the UK a greener and more beautiful place.