Quick Facts
Easy to grow and maintain
Plants last for many years
Ferns like shade and soil improved with homemade garden compost
Many are evergreen
Plant in autumn or spring for best establishment
Cut back deciduous types in winter before new spring growth starts
Make new plants by division or by growing from spores


Before you get started
What are ferns?
Ferns are an ancient type of plant, dating back more than 360 million years. They don't produce flowers or seeds, but spores instead. They are prized for their attractive leaves, or fronds, which typically unfurl from crosiers (tightly coiled buds) in the centre of the plant.
Ferns are perennials, meaning they live for several years, some dying down in winter ( ), while others keep their foliage all year (evergreen). In the wild, ferns grow in a range of habitats, from woodland to dry rock crevices or swamps, but most ferns available to gardeners tend to like shade.
Hardy ferns can be kept outdoors all year round in the UK and need no additional frost protection. There are also some half-hardy ferns that can be grown outdoors in mild areas in the south and west of the UK, or in other sheltered spots if given protection over winter.
Choosing ferns
Ferns come in many shapes, sizes, textures and colours. Most are woodland plants that like shady conditions and rich soil, full of organic matter.
Getting the right look
Consider what you want from your plant, such as:
- Size – most ferns reach 60cm-1.2m (2-4ft) tall, with only a select few being smaller or significantly taller
- Shape – you can choose from bold, vertical growth or low arching fronds, or anything in between. The fronds can be densely packed, or light and airy, and are often intricately toothed, lacy or feathery, but can also be tufted, ruffled or curly
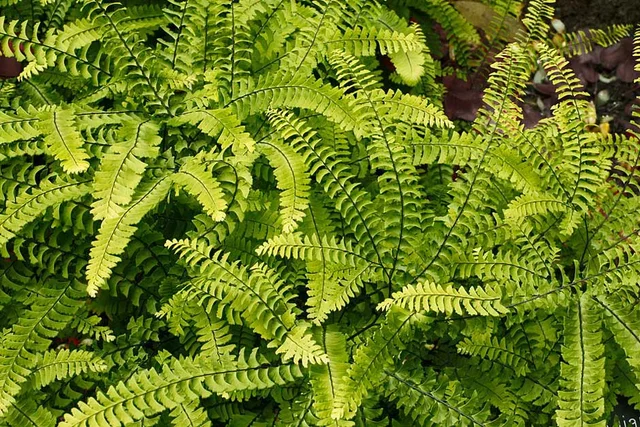
- Evergreen or deciduous – do you want foliage all year round (evergreen) or from spring to late autumn (deciduous)? Some deciduous ferns turn attractive coppery shades in autumn
- Colour – you can choose from foliage in every shade of green, as well as tinged with purple, pink, silver or bronze. The stems can be also be various colours, including coppery or dark purple
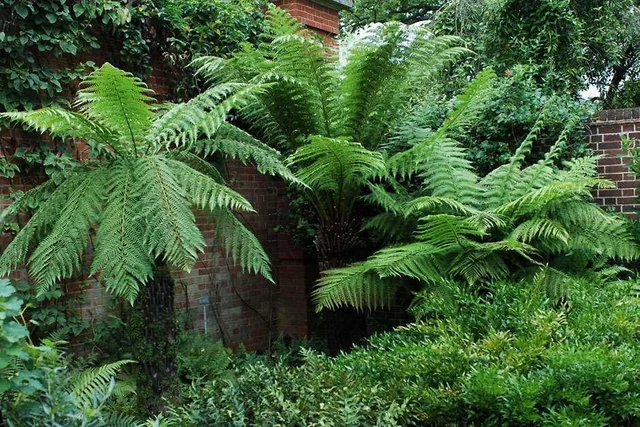
- Style – do you prefer the natural look of British ferns such as Blechnum spicant, or something more exotic, such as a Japanese painted fern or a tree fern?
How and what to buy
Ferns are available all year round in containers. You can buy a wide range in garden centres, online or from specialist nurseries.

Where to get ideas and advice
To explore and narrow down your potential planting choices, you can:
- Visit gardens that feature lots of ferns and see which ones you like best. Woodland gardens are often a good choice, especially in spring when ferns are unfurling their new fronds
- All the RHS Gardens feature ferns, and all the plants are labelled, so you can note down your favourites
- Ask at nearby garden centres, which should offer a range of ferns that do well in your local conditions
- Go to RHS Find a Plant and search for ‘ferns’ to browse the photographs and plant descriptions, and find out where to buy them
- Visit a specialist nursery, in person or online

Planting
When to plant
Ferns are best planted in spring or autumn, as this gives them time to settle in before any extremes of hot or cold weather.
Where to plant
Most ferns are woodland plants that like light or dappled shade. They can usually tolerate some sun, as long as they have plenty of moisture.
Ferns like soil that is rich in organic matter, such as garden or leafmould. Most prefer neutral to – see how to test your soil – but a few need acidic conditions. They usually prefer plenty of moisture, but not waterlogging, although certain types will tolerate either very wet or dry soil.
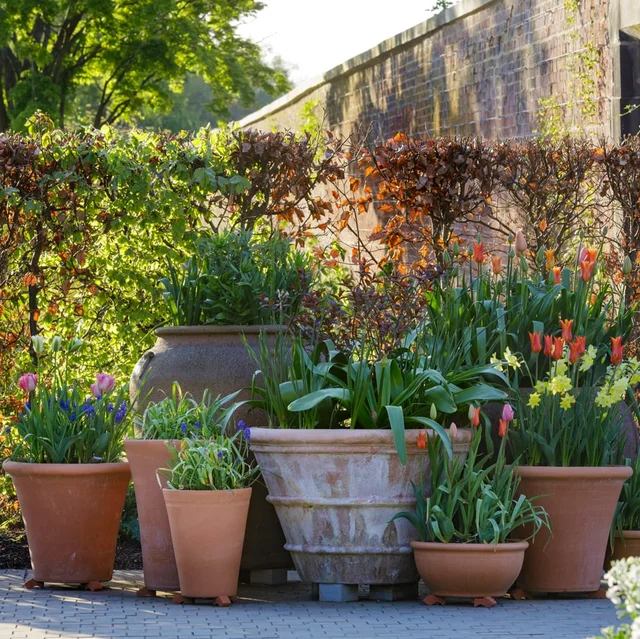
Ferns can also be grown in large containers.
Most of the ferns readily available to gardeners are hardy, which means they will survive cold winters outdoors (check plant labels before buying). However, you may find some half-hardy or tender ferns on sale. These need to be kept frost-free over winter, so are best planted in containers that can be moved indoors.
Tree ferns are not fully hardy, so give them a warm, sheltered spot. Larger specimens, with the growing point higher off the ground, may survive outside over winter if protected with straw or , especially in milder parts of the UK. It’s best to bring smaller tree ferns indoors over winter.
Prepare your soil
Dig in plenty of organic matter such as garden compost or leafmould to improve the soil structure and hold in moisture. This is particularly important when planting under trees, where the soil can be poor and dry.
How to plant
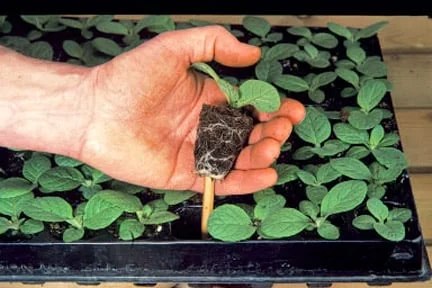
Ferns are easy to plant and should settle in quickly. They are perennials, meaning they live for several years, and should be planted in the same way as most other container-grown perennials – see our guide to planting perennials.
You can also plant ferns in large containers, either singly or with other shade-loving plants. It’s simple and takes little time – see our guide to planting up containers. Ideally use a mix of three parts peat-free multipurpose compost, one part peat-free John Innes No.3, and one part horticultural grit by volume.
Ongoing Care
Watering
Water newly planted ferns regularly for at least their first year. After that, most will only need extra water during long dry spells. Be sure to direct the water to the roots and not onto the fronds or crown, as this can encourage rot.
Ferns in containers should be watered regularly during the aiming to keep the moist but not soggy, and especially in hot weather.
Those in very dry soil beneath trees may also benefit from additional watering in summer.
Tree ferns need damp conditions and will not survive drying out, so spray the trunk with water regularly, especially during hot or dry spells.
Feeding
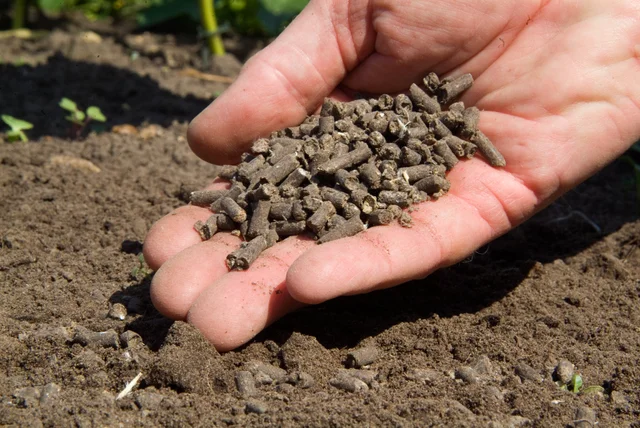
Apply a mulch of garden compost or well-rotted manure to the soil surface annually in spring, to enrich the soil.
Most ferns planted in the open garden need no additional feeding if mulched annually, but if soil conditions are particularly poor, you could add a well-balanced fertiliser, such as Growmore or blood, fish and bone, in spring.
Ferns in containers should be given a general fertiliser, such Miracle-Gro, during the growing season.
Tree ferns will benefit from a liquid feed applied monthly to the trunk, in spring and early summer, or a controlled-release fertiliser scattered around the base in spring.
Weeding
Most ferns form quite a dense clump, which hinders weed growth. Mulching around the base with garden compost in spring will help to deter the of annual weeds.

Pruning and Training
Simply snip off any dead or ragged fronds before the new crosiers (leaf buds) start to unfurl in spring. Cut them off at the base with secateurs or snips, taking care not to damage any newly developing fronds. Clear away the debris to encourage good air circulation.
Compost the old fronds
After removing the old tattered fronds, chop them up and add them to your compost bin. You can then use the resulting compost as a mulch around your ferns.
Propagating
Division
The easiest way to propagate ferns is by division. There are two main methods, depending on how the fern grows.
Dividing ferns with creeping rhizomes
These ferns produce horizontal stems ( ), which often resemble roots, just below or on the soil surface, as a natural way of spreading.
- In spring, remove one of these rhizomes and cut it into segments 5–7.5cm (3–4in) long, ensuring that each segment has at least one growth and a small
- Plant each one individually into a small pot or seedtray of multipurpose , at the same level it was previously growing. Planting too deeply encourages rotting
- Place in light shade and keep the compost moist
Dividing ferns with several crowns
Mature ferns may naturally develop additional crowns, or , although this can take up to ten years. Other ferns may look as if they have several crowns, but are in fact a clump of different plants, potted up together by the nursery. In both cases, you can split the crowns apart in spring, using two back-to-back forks, and pot up or replant them individually. This method is similar to dividing a clump-forming – see our guide to dividing perennials.
Bulbils
A few ferns, such as some types of soft shield fern (Polystichum setiferum), develop small bulbils (mini- ) along the midrib of the frond. If you peg the frond down onto the soil, the bulbils will root and can then be detached and into pots.
Leaf bases
This process can be a little tricky, but is useful for propagating sterile cultivars (that don’t produce spores), especially those of the hart’s tongue fern (Asplenium scolopendrium).
- Dig up a mature plant and carefully peel off several short, dead-looking leaf bases from the outside of the clump then replant the original fern
- Wash these leaf bases and remove any remnants of the frond or root
- Plant ideally into sterilised compost (see below), 1cm (½in) apart, with the attachment point (the green end) pointing upwards
- Place the container inside a clear polythene bag, inflate and seal
- Keep in cool conditions with good indirect sunlight. After three to four months, young fronds should be visible emerging from the newly developed bulbils
- Prick out into individual pots, planting ideally into sterilised compost (see below), and grow on until large enough to plant out
Spores
Propagating ferns by spores is a slow and rather tricky process, but makes an interesting challenge for experienced gardeners.
The majority of ferns produce their spores in small heaps or lines on the undersides of mature fronds. The spore heaps (sori) are pale green when unripe and usually turn dark brown or black when ripe. If they are a pale rusty brown, the spores have probably already fallen. Spores ripen in sequence along the frond (from tip to stem), so you will usually find both ripe and unripe spores on a single frond, especially in mid- to late summer.
To collect spores, place a small piece of spore-bearing frond in a dry paper envelope and keep for a day or so in a warm, dry place. Any ripe spores will fall to the bottom of the envelope, resembling brown, yellow or black powder.
How to sterilise compost
Before sowing the spores, it’s essential to surface sterilise the compost to kill any stray fungal, moss or fern spores. It’s a simple process:
- Fill the pot or small seedtray with John Innes or a 50:50 mix of peat-free multipurose compost and
- Place a piece of newspaper on the compost, cut to size so it covers the whole surface
- Carefully pour boiling water over the newspaper until the water coming from the base of the pot or tray is very hot
- Cover the pot or tray with a piece of glass or plastic, or aluminium foil, and leave until it’s cold
- Remove the glass and newspaper when ready to sow
How to sow spores
- Sprinkle the spores very thinly over the surface of the sterilised compost
- Immediately cover the pot or seedtray with clear polythene or cling film, held in place with an elastic band
- If sowing different batches, sow each in a different room to avoid cross-contamination, as the fine spores can easily drift
- Label the batches clearly with waterproof pen
- Place in a cool, lightly shaded place for a month or two, by which time a green film should be visible on the surface - this will gradually form into distinct filmy green structures (prothalli)
- After a further month or so, the first tiny fronds will appear
- When two or three fronds are visible, prick out the sporelings, in clumps, into pots of sterilised potting compost
- Place inside a clear polythene bag for a few days, to maintain humid conditions, as dry air can be fatal
- Keep in indirect light
From a midsummer sowing you can expect true fern fronds by winter, but autumn sowings may take until the following spring. After one to two years the young ferns will be large enough to plant out in the garden.
Problems
Ferns are usually trouble-free once established, as long as they’re growing in suitable conditions (check plant labels for details when buying). The fronds may turn brown, especially at the tips, in overly dry conditions. In soil or overcrowded conditions, ferns may be susceptible to rotting.
Tree ferns, and others that are not fully hardy (such as the ferns featured in our section on tender ferns for growing outdoors), need protection over winter. Tree ferns also need regular watering during dry weather in spring and summer.
There are only a few pests that affect ferns. Slugs and snails may eat the delicate young fronds, while ferns in containers may be attacked by vine weevils.