T-budding is an easy form of grafting (propagating), where a bud rather than shoot is attached to a rootstock to make a new plant. It sounds complicated but, with practice, can be mastered by anyone and, as just one bud is needed to make a rose or tree, it is very economical.
By The RHS Advice Team
Quick facts
Suitable for - Trees, especially rose-family plants (Rosaceae)
T-budding is used for roses, but is also suitable for propagation of many trees (although chip budding is more usually used for trees).
Some people find T-budding easier than chip budding, although neither is as technically demanding as . In chip budding, a on a sliver of wood that exactly matches a notch on the rootstock is tied tightly to the stock stem. For grafting, a piece of wood with several buds is attached to the rootstock.
When to T-bud
T-budding should be carried out from mid- to late summer in cool weather.
How to T-bud
Before you start, you need to choose a rootstock (the plant you will be propagating onto). Rootstocks can often be bought from rootstock growers and nurseries that specialise in the type of plant in question. Alternatively, they can be raised from seed or .
Choose a rootstock with desirable characteristics; such as a dwarfing habit that makes fruit trees more compact, or a rootstock that resists root diseases, or one that is easier to propagate than the (top part of the budded tree).
Plant the rootstocks in autumn, about 30cm (1ft) apart, in a nursery bed.
If the weather is dry, water the rootstocks for two weeks beforehand to ensure that the will ‘lift’ easily; this is crucial for success.
For the wood, select strong-growing, ripened shoots. For roses, select a flowered shoot about 30cm (1ft) long with three or four growth buds. Remove the foliage and place in a plastic bag to prevent drying out.
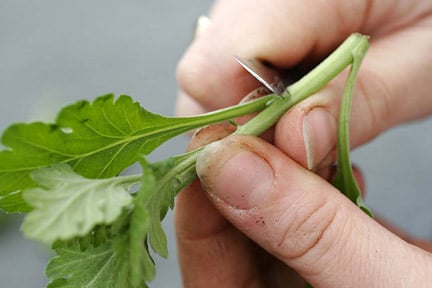
Cut away a healthy bud with a strip of bark extending about 2.5cm (1in) above and below the bud. Carefully pull away the woody material from behind the bud.
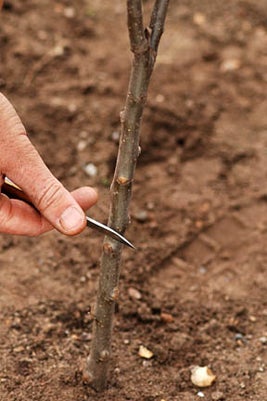
Cut the rootstock just deeply enough to pierce the bark and make a T-shaped incision at a height of 15-30cm (6-12in) from the base, with the horizontal cut about 13mm (½in) long and the vertical cut 2-4cm (1-1½in) long. For rose bushes, insert the bud 5-10cm (2-4in) above ground level and, for standard roses, two or three buds are grafted 7.5cm (3in) apart spread around the stem at the height at which the top is required.
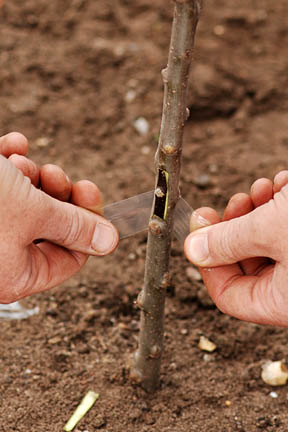
Ease the flaps of the T outwards to reveal the cambium layer (green wood) beneath.
Insert the bud behind the bark flaps with the bud just below the cross-stroke of the T.
Trim away the surplus tail protruding above the T.
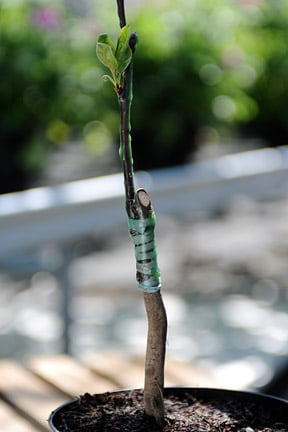
Secure the bud using a rubber binding tie or damp raffia around the grafted area.
When the shoot develops the following spring cut off the growth above the bud.
Problems
Failure of buds to take usually results from not cutting accurately enough to get the cambium layers to match. Practise on spare shoots until a really good match can be reliably cut. Some less experienced gardeners like to attach several buds as at least one should take. The RHS, horticultural colleges and others offer budding courses and these are strongly recommended.
Knowing when to remove the ties can be difficult; the bud and the cambium must have united and this is indicated by swelling of the budded part of the stem.