Getting Started
Thanks to its ‘superfood’ status, kale has enjoyed a dramatic rise in popularity in recent years. Luckily it’s easy to grow, productive and looks great, providing both baby salad leaves and tasty, nutritious greens for cooking or adding to smoothies. It’s particularly valuable in winter, providing fresh leaves during the coldest months.
Kale is a member of the cabbage (brassica) family and is one of the hardiest leafy vegetables. It forms large, attractive plants up to 90cm (3ft) tall, although compact varieties are also available. Plants can be highly ornamental too, so they needn’t be confined to the veg plot, with varieties offering a choice of smooth, puckered or frilly green or purple-red leaves, sometimes with purple veins or stems. Kale with frilly or curly leaves is also known as borecole.
You can use kale as a cut-and-come-again salad crop when young, and/or as greens for cooking, ready to pick from autumn through to spring. The leaves can be harvested over many months, and regular picking encourages more to grow.
Jobs to do now
Plant out
Water in dry spells
Month by Month
Sow
Plant Out
Harvest


Choosing What To Grow
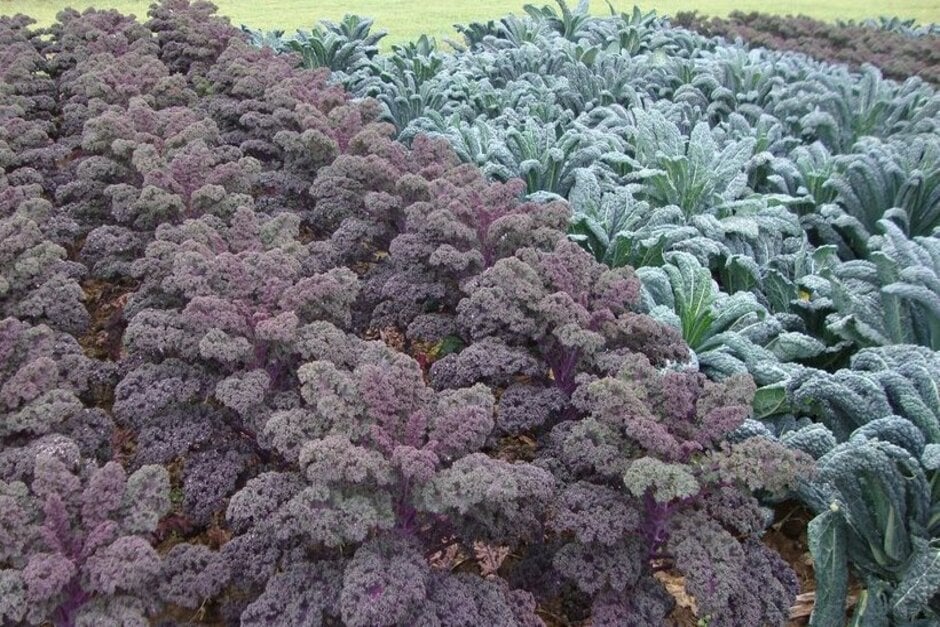
You can choose from a wide array of kale varieties, many of which are highly ornamental as well as tasty and productive. There are varieties with smooth, ruffled or densely frilly leaves, long and narrow or broad and deeply divided, in various shades of green through to dark purple-red. The most well-known is ‘Cavolo Nero’ (also sold as ‘Black Tuscan’ or ‘Nero di Toscana’), but there are many other varieties to bring interest to your veg plot, borders and meals. Most varieties are , cropping until they flower in their second year, but there are a few heirloom varieties too, such as ‘Daubenton’s’ and ‘Taunton Deane’, which will continue cropping for several years.
Some varieties are particularly suited as salad crops, especially those with colourful leaves, such as ‘Red Russian’, and some suppliers sell packets containing a mix of salad varieties. Kale is also quick and easy to grow as microgreens on a sunny windowsill – all varieties are suitable, but red or purple ones in particular look great in salads.
For the most reliable varieties, look for those with an RHS Award of Garden Merit (AGM), which shows they performed exceptionally well in our growing trials – see our list of AGM fruit and veg (135kB pdf, includes borecole/curly kale) and our Recommended Varieties below. You can also see many crops, including kale and other brassicas, in the veg plots at the RHS gardens, so do visit to explore how they’re grown, compare the varieties and pick up useful tips and inspiration.
What and where to buy
Kale seeds are widely available in garden centres and from online seed suppliers. Young plants may also be available in spring and early summer, from the same sources.
Recommended Varieties

'Nero di Toscana'
Popular Italian variety with narrow puckered leaves. Also called ‘Black Tuscan’ or ‘Cavolo Nero’.

'Yurok' AGM
An F1, Tuscan-style variety, with narrow puckered leaves on compact, productive plants, ideal for small spaces.

'Redbor' AGM
Adds a splash of purple to veg plots and borders. Tall, sturdy and fully hardy.


Preparing The Ground
Kale prefers rich, well-drained, firm soil, but will grow in most soil types and conditions. It likes sun, but will also cope in light shade.
To prepare the ground, weed it thoroughly and dig in plenty of well-rotted manure or garden compost. Then rake the soil level and firm it well. Alternatively, if you're practicing no-dig, the soil with organic matter ahead of sowing or planting directly into the mulch.
Sowing
Kale is easy to grow from seed sown indoors or outdoors, in spring and early summer. Most varieties grow into large plants, so need plenty of ground space. However, there are several more compact varieties, ideal for containers and smaller plots. Kale should be grown with othercabbagerelatives in crop rotations, to reduce the potential build-up of soil-borne problems in the veg plot.
If grown as a salad crop, young kale plants can be kept small and need far less space than mature plants. Sow small batches over several weeks, in the ground or in containers, to provide baby salad leaves over a long season. Kale can also be grown as microgreens on a sunny windowsill.
Sowing indoors
You can sow kale indoors from March, to get an early start. Indoor sowing also keeps safe from slugs and snails, and is a good option if you have club root disease in your soil, as the plants develop a healthy root system before being into the ground.
It’s best to sow in a modular tray, to keep root disturbance to a minimum when transplanting outdoors in late spring/early summer. Fill the with peat-free multi-purpose , water well, then make a 1cm (½in) deep hole in each one. Sow two seeds in each hole, then cover with compost. If both germinate, remove the weaker seedling, then keep in bright light and water regularly. For more sowing tips, see our guides below.
Sowing microgreens
Kale is quick and easy to grow as microgreens on a sunny windowsill at any time of year. Sow the seeds into a small seedtray of damp peat-free . Water regularly, and in just two or three weeks you’ll have tasty nutritious seedlings to add to salads and sandwiches.
Sowing outdoors
Like most large brassicas, kale is sometimes sown into a separate , then later to its final growing site at a much wider spacing. This is because it would take up a lot of room on the veg plot during the prime . However, you can also sow it straight into its final site, to avoid transplanting.
You can sow kale seeds outdoors from March to June. Choose and prepare your sowing site as explained above, make a shallow about 1cm (½in) deep, then water along the base if dry.
If using a seedbed, sow the seeds thinly along the drill, 10-15cm (4-6in) apart, or thin out the to that spacing if sown more thickly. Young plants will be ready to move to their final growing site 6-8 weeks after sowing (see Planting).
If sowing in their final position, sow three seeds approximately every 45cm (18in) along the drill. Spacing will vary according to the variety. Large varieties can be sown 60cm (24in) apart and compact varieties sown 30cm (12in) apart – check individual seed packets for details. After , thin out each cluster of seedlings to leave just one at each point. Space rows at least 45cm (18in) apart.
When growing as a salad crop, just sow direct into their final position, spacing seeds about 7.5cm (3in) apart. Sow little and often for a regular supply of young leaves.
Sowing in containers
If you’re short on ground space or have club root disease in your soil, you can sow kale directly into large containers of peat-free multi-purpose , in a warm, sunny spot. This is particularly suitable for growing kale as baby salad leaves.
For salad plants – scatter the seeds thinly, cover with about 1cm (½in) of compost, then water well.
For mature kale – choose a compact variety, such as ‘Dwarf Green Curled’, and sow direct into a large container at least 30cm (12in) wide and deep. Sow three seeds every 30cm (12in), then when the appear, thin out the cluster to one strong seedling.
For more container-growing tips, see our guides below.
Planting
In late spring or early summer, move young kale plants to their final growing position when they’re 10–15cm (4–6in) tall. This applies to plants sown in a , raised from seed indoors or newly bought . Harden off indoor-sown plants first, to acclimatise them to outdoor conditions.
Carefully lift each plant individually, or remove from the modular tray, trying not to disturb the roots. Set them in their new planting holes more deeply than before, with the lowest leaves at the soil surface, so they root in deeply. Kale can grow into large top-heavy plants that need to be well anchored in the soil. Firm each plant in and water well.
For growing as mature plants, space them 30-60cm (12-24in) apart, depending on the variety. Wide spacing is crucial to give them plenty of light and air, which helps them to crop successfully and deters fungal diseases. If growing purely as a baby-leaf salad crop, spacing can be much closer, about 7.5cm (3in) apart. Protect the young kale plants from slugs and snails and cover with fine-mesh netting to avoid insect and bird damage.
Planting in containers
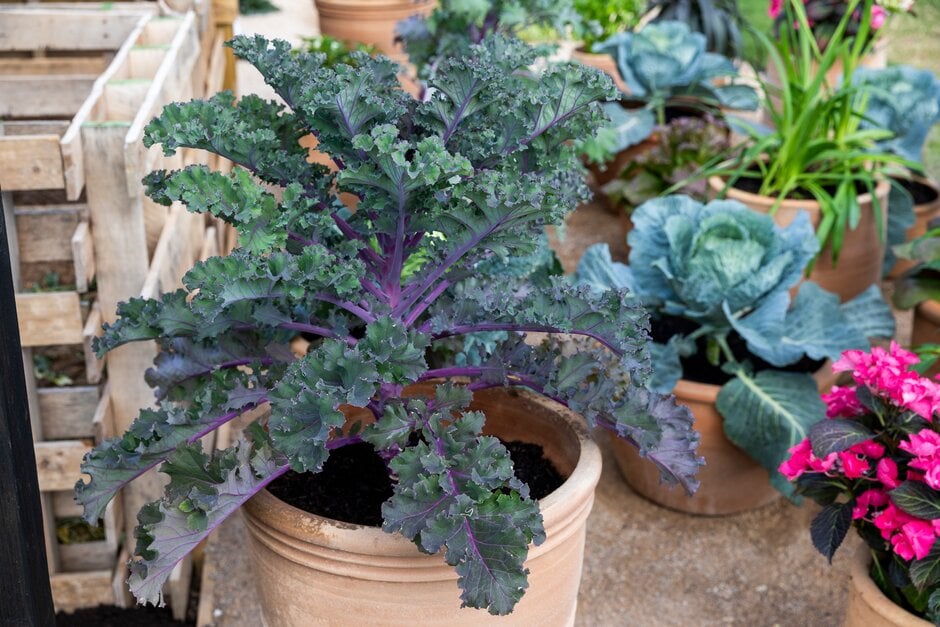
Containers are a good option when growing kale as a baby-leaf salad crop – plant the young kales about 7.5cm (3in) apart. You can also grow kale to maturity in containers – choose a compact variety, such as ‘Dwarf Green Curled’, and use a large container. A pot 30cm (12in) wide and deep is suitable for one plant. Use peat-free multi-purpose and plant deeply, in a similar way to planting in the ground (see above). Position the container in a sunny spot and keep it well watered, especially in summer.
Plant Care
Once established, kale grows slowly and steadily without needing much attention. Remove weeds and faded lower leaves, to maintain good airflow between plants and deter fungal diseases. Also keep the crop protected from insect and bird damage.
Watering
Water and young kale plants regularly, so the soil doesn't dry out. After that, plants should only need watering during prolonged dry spells. Plants in containers need regular watering to stop the drying out. For water-saving tips, see our guides below.
Mulching
If growing kale to maturity, apply a thick layer of , such as well-rotted manure or garden compost, around plants to help hold moisture in the soil, reduce the need for watering and deter weeds. Mulching is not usually necessary nor practical around baby-leaf crops.
Feeding
Feeding isn’t usually needed, except on poor soils or when growing in containers. An organic-based nitrogen-rich fertiliser will give plants a boost.
Weeding
Keep young plants weed-free, to reduce competition for light, water and . Regular weeding throughout the also helps to maintain good airflow between plants, which deters fungal diseases. See our tips on controlling weeds.
Supporting tall plants
In autumn, insert sturdy bamboo canes to support tall kale varieties, especially in exposed locations. This will prevent winter gales buffeting these top-heavy plants and potentially loosening the roots.
Protecting the crop
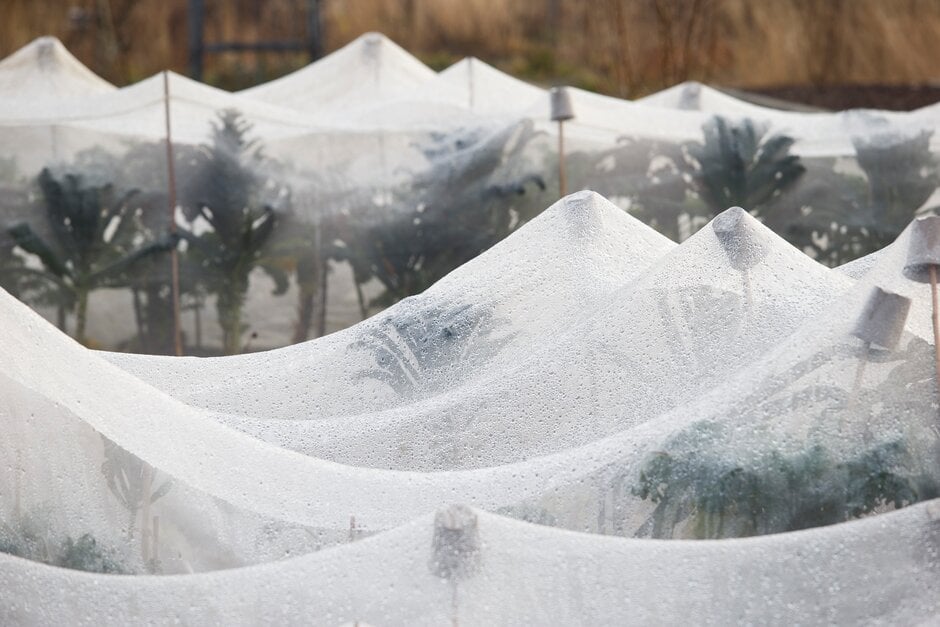
It’s best to keep kale covered with insect-proof mesh, supported on hoops or bamboo canes, to avoid damage by various brassica-loving creatures. See Common problems, below, for more tips.
Harvesting
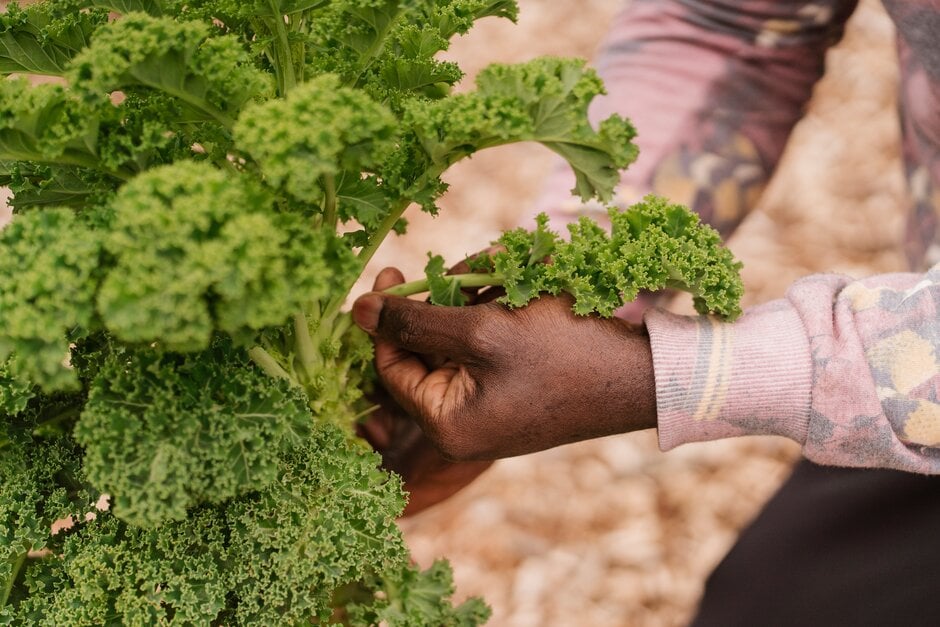
Kale should be ready to harvest from September onwards. Pick two or three of the lower leaves from each plant at a time.
When growing as a cut-and-come-again salad crop, start harvesting as soon as plants reach 10–15cm (4–6in) tall. Either pick individual leaves from several plants, or cut the whole rosette of leaves from a plant, in which case it should re-sprout to provide another crop.
Problem Solving
Kale is generally robust and hardy, producing a large crop of leaves over many months. However, as it’s a brassica, it can be damaged by a number of brassica-loving creatures and is susceptible to several brassica diseases – for prevention tactics and more details, see Common problems, below.
Common Problems


Cabbage caterpillars
Cabbages and other brassicas are a food source for the caterpillars of several species of moth and butterfly.

Cabbage root fly
The maggots of cabbage root fly eat the roots of cabbages and other brassicas, they can also tunnel into the roots of swedes, turnips and radish.


