Getting Started
Squashes are eye-catching and productive plants, producing fruits in a wide choice of colours, shapes, sizes and flavours. They range from large sprawling vines to more compact ‘bush’ plants, so there are types to suit all gardens.

Squashes are closely related to pumpkins and courgettes, which are all known botanically as cucurbits – most are varieties of Cucurbita moschata, C. maxima or C. pepo. All are grown in a similar way, thriving in rich, moisture-retentive soil, with lots of warm sunshine. These tender plants are best started from seed indoors in spring, so they do need some attention initially, but once outdoors they usually grow rapidly and can be highly productive.
Squashes are usually grown in the ground, as they need plenty of space, but compact varieties of summer squash can be grown in large containers.
Jobs to do now
Water in dry spells
Feed container plants
Harvest
Month by Month
Sow
Plant Out
Harvest


Choosing What To Grow
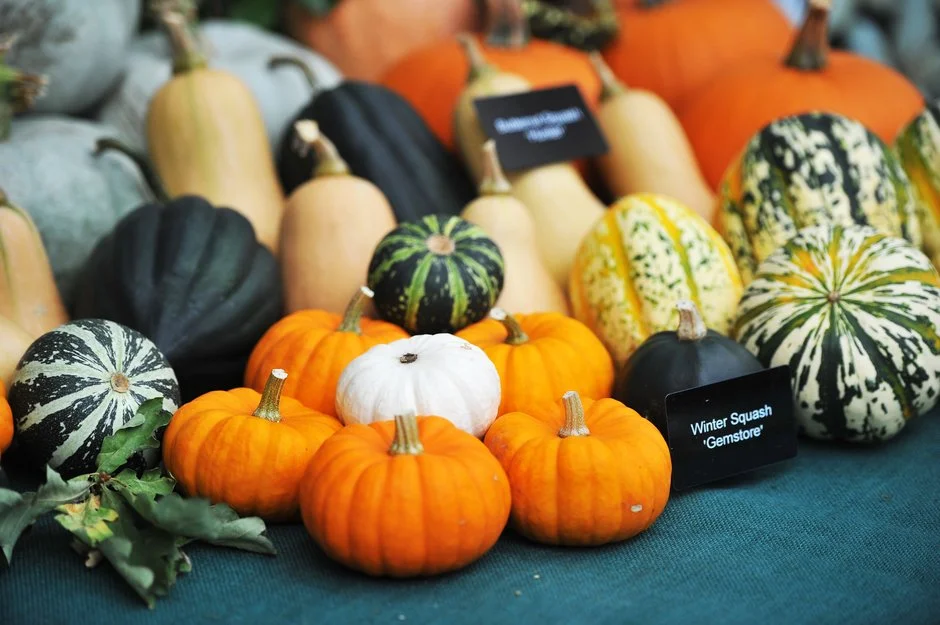
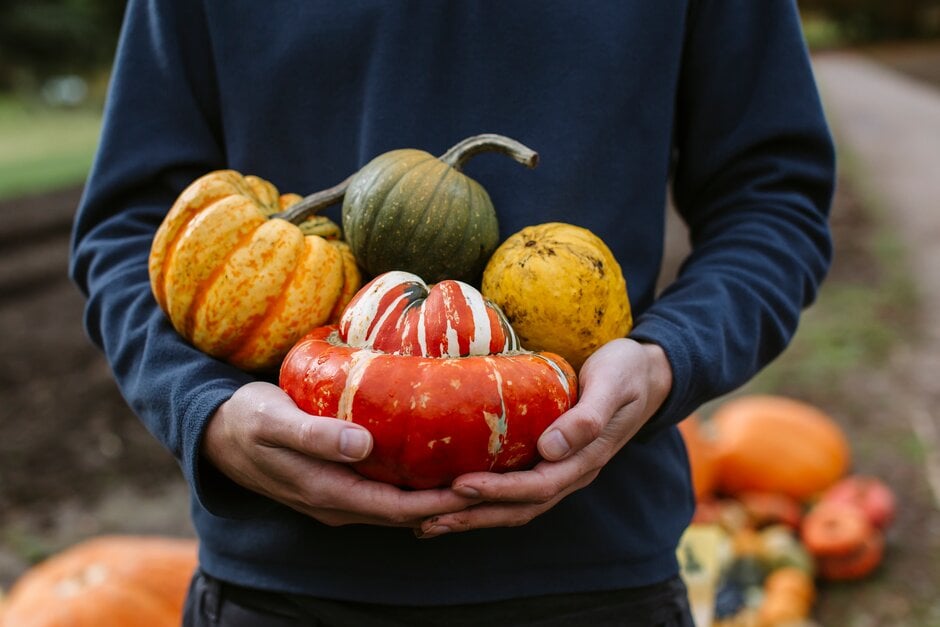
There are two main types of squash – summer and winter. The fruits of summer squashes have a thin skin (like courgettes), are picked when young and don’t store for long, while winter squashes (like butternuts) are grown to maturity then stored for use into winter. There are various categories based on fruit shape, including acorn squashes, patty pans and crooknecks, and many varieties too, producing fruits of various colours, sizes and flavours.
Some varieties are vigorous trailing plants that spread for several metres or can be grown vertically up supports. There are also bush types, which stay reasonably compact, although still take up about a square metre. Smaller varieties can be grown in large containers, but most fare best in the ground. So choose varieties that suit the amount of growing space you have available. Also look for varieties with an RHS Award of Garden Merit (AGM), as these should crop reliably – see our list of AGM fruit and veg (135kB pdf) and our Recommended Varieties below. You’ll also find squashes growing in the veg areas at RHS gardens over the summer months, so do visit to compare varieties and pick up growing tips.
What and where to buy
You’ll find a wide choice of varieties as seed in garden centres and from online retailers.
Young plants are also available in spring and early summer, ready for planting out – ideal if you only want one or two, or don’t have space indoors to start them off yourself. However, the choice of varieties will be quite limited.
Recommended Varieties

‘Crown Prince’ AGM
Winter squash – trailing type. Fruits have bluish skin, orange flesh, good flavour and store well.

'Harlequin' AGM
Winter squash – acorn type, with green, gold and yellow fruits. Stores well when fully ripe.

‘Sunburst’ AGM
Summer squash – patty-pan variety, its small fruits have a yellow skin and nutty flavour.


Preparing The Ground
Choose a warm growing site in full sun, with rich, moisture-retentive but not soil. Squashes also need plenty of space – even the more compact bush varieties can easily spread to 90cm (3ft) across.
Before sowing or planting outdoors, prepare the ground where each squash plant will grow. Make a hole about 30cm (1ft) wide and deep, then fill it with a mix of soil and organic matter, such as home-made garden compost. Alternatively, if you’re practising no-dig, the surface and sow or plant into the mulch. Space each sowing/planting site at least 90cm (3ft) apart for bush plants and 1.5m (5ft) for trailing plants.
You can also plant summer squashes in growing bags and large containers of peat-free multi-purpose or .
Sowing
Squashes are usually sown indoors in spring, for more reliable and to give them a head start, then planted out after the last frost. They can be sown outdoors too, but not until late May or early June. Germination outdoors may be less reliable if temperatures dip, and the are vulnerable to slugs and snails, as well as poor weather.
Sowing indoors
Indoor sowing usually gives an earlier and larger crop, as it provides a longer . It’s particularly beneficial in colder regions, where outdoor sowing would have to be quite late. It keeps the tender safe from unexpected late frosts.
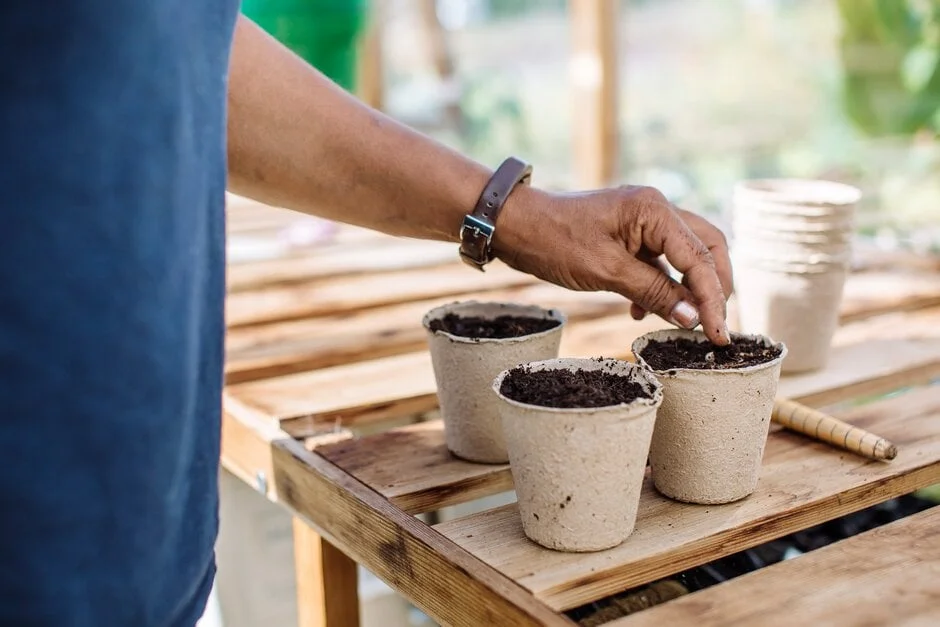
Sow squash seeds from mid- to late April, positioning them on their side, 13mm (½in) deep, in 7.5cm (3in) pots or modular trays of peat-free multi-purpose . Sow only one seed per pot/module, to minimise root disturbance when transplanting later on. Keep at 18–21°C (65–70°F) in a or on a warm windowsill. Cover with a clear lid or polythene bag to hold in moisture, until the seedlings appear. For more sowing details, see our guides below.
Water the seedlings regularly and keep in good light, until ready to plant out after the last frost – see Planting, below.
Sowing outdoors
Squash seeds can be sown outdoors in late May or early June. Prepare the ground as detailed above, spacing each sowing site 90cm (3ft) apart for bush varieties and 1.5m (5ft) for trailing varieties. If possible, warm the soil for a couple of weeks ahead of sowing by covering each sowing site with a cloche or plastic-free fleece.
Sow two or three seeds into each prepared sowing site, 2.5cm (1in) deep, then protect them with a or plastic-free . Leave it in place for as long as possible after . If more than one seedling germinates in each growing site, thin out to leave just the strongest one.
Planting
You can plant indoor-raised or bought plants outside after the last frost. But first, harden them off to gradually acclimatise them to outdoor conditions. Plant young squash plants into prepared ground (see above), taking care not to disturb the roots. Firm them in gently, then water well. Space bush varieties 90cm (3ft) apart and trailing varieties 1.5m (5ft) apart.
You can also plant summer squashes in growing bags or large containers in a sunny, open spot. Plant one or two per growing bag or one in a container at least 45cm (18in) wide, filled with peat-free multi-purpose or . Make sure there is plenty of space around the container, to ensure good air circulation and allow plants to spread. Overcrowded conditions can encourage fungal diseases.
Plant Care
Watering
Squashes are thirsty plants, especially when fruiting, so water regularly in dry spells. Insufficient water can also encourage powdery mildew. Try not to wet the leaves – water directly onto the soil. To make this easier, sink a plant pot into the ground beside each plant, then pour the water into it. This ensures the water goes down to the roots. It’s also a good idea to insert a short beside trailing plants, so it’s easy to tell where the centre is after it has grown lots of leaves and long shoots. Use rainwater from a butt whenever possible, and ideally water early in the morning or in the evening, to reduce evaporation. For more water-saving tips, see our guides below.
Mulching
After planting, cover the soil surface with a thick layer of , such as home-made garden compost, to help hold in moisture and reduce the need for watering. Leave a gap around the base of the plant stem though, to keep dampness away, which could lead to rotting.
Feeding
Squashes growing in the ground shouldn’t need feeding, but to get a good crop in containers or growing bags it’s best to feed regularly. Apply an organic-based, high potassium liquid fertiliser every 10 to 14 days once the first fruits start to swell.
Ripening winter squashes
With winter squashes, place a tile, brick or wooden board beneath larger fruits to lift them off the damp soil and prevent rotting. Also make sure they are exposed to full sun, to aid ripening.
Pruning And Training
If you have plenty of space, trailing types can be left to sprawl over the ground, but if you need to limit their spread, you can train the stems around in a large circle, inserting short canes to hold them in place. You can also simply cut off any stems that stray beyond their bounds.
Trailing squashes can also be trained up supports – such as an arch, pergola, wigwam of hazel stakes or a strong trellis – but make sure they’re large and sturdy enough to carry these vigorous plants and their crop. You may need to use netting to support individual heavy fruits, so smaller-fruited varieties may be more suitable.
Harvesting
Summer squashes produce fruit for several months, from mid-summer onwards, sometimes right up to the first frost. Harvest their fruits when small and tasty, with a soft skin. Regular picking encourages further fruits to form.
Winter squashes can also be harvested and used straight away. Alternatively, once ripened, they can be stored for many months, for use through the winter. Keep the fruits on the plant for as long as possible to develop the best flavour, but pick them before any frosts are likely. Cut the fruits from the plant with at least 10cm (4in) of stem still attached – if you cut too close to the fruit, it leaves a soft area that is vulnerable to rotting in storage.
Storing
With winter squashes for storing, let the fruits fully ripen on the plant – the riper they are when harvested, the better they’ll keep. Then lay them out in the sun for an additional week or two, either outdoors or in a greenhouse, to harden the skin, which also helps to ensure they store well. Make sure they are safely inside before the first frost.
Then store the fruits in a well-ventilated place at 10–15°C (50–60°F), spaced out so they don’t touch. Depending on the variety, winter squashes should keep for three months or more. Check them regularly for any signs of deterioration or rot.
Problem Solving
Squashes are tender plants, so are susceptible to cold and frost. They can also be affected by various diseases, and slugs and snails may eat young plants – see Common problems below for more details.
Common Problems

Courgette, marrow, pumpkin and squash problems
Courgettes, marrows, pumpkins, squashes and other members of the cucurbit family are fun to grow. It can be worrying, then, when problems strike. Know...

Grey mould
Grey mould, caused by the fungus Botrytis cinerea, is a very common disease, causing a soft decay of plant tissues accompanied by a growth of fuzzy gr...

Slugs and snails
Slugs and snails are common garden animals, and they are well suited to the damp, mild climate of the UK. A few species feed on garden plants, but mos...
