Getting Started
Easy to grow, nutritious and tasty, cabbages are veg plot favourites. There are many types, of various shapes, sizes and colours, for harvesting across the seasons. You can use them raw in salads and cooked in many ways, from hearty soups to traditional bubble-and-squeak.
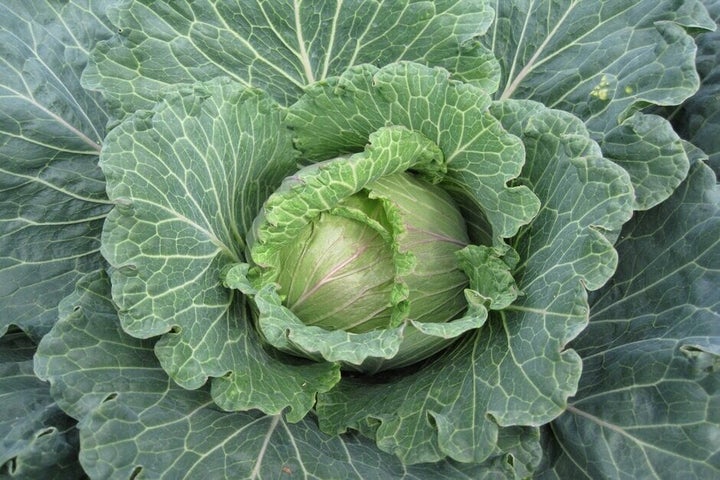
A member of the brassica family, cabbages are hardy, tasty and versatile. They can be sown indoors or outside, and are ready to harvest in about four to six months. There are lots of varieties, generally categorised according to harvesting season, although some overlap. If you sow small batches of each type, you can enjoy fresh cabbages all year round. The four main types are all grown in the same way, but with different sowing and harvesting times:
- Spring cabbages – usually form small, dense, pointed heads. Sow in late summer for overwintering. Pick either as loose spring greens or leave to mature and form heads from mid-spring to mid-summer
- Summer cabbages – available in many shapes and sizes. Sow from late winter to mid-spring and harvest in mid- to late summer. These have been bred to withstand summer heat
- Autumn cabbages – often form large heads, so need wider spacing. Sow in mid-spring to early summer and harvest before winter. Some varieties can be stored for use in winter
- Winter cabbages – provide fresh harvests when little else is available. They include crinkly Savoy types and smooth drumheads, as well as attractive red-tinged or purple varieties. They usually form large heads, so need plenty of space. Sow in late spring or early summer. Once mature, they often stand in good condition for months until needed. Alternatively, store in a cool, frost-free place
Like most brassicas, cabbages are prone to caterpillar and pigeon damage, so it’s best to cover the crop with fine-mesh netting. They should also be grown in a different spot each year to reduce any build-up of soil-borne diseases. For more on protecting cabbages, see Problems below.
Jobs to do now
Sow summer cabbages
Harvest winter cabbages
Month by Month
Sow
Plant Out
Harvest
Choosing What To Grow
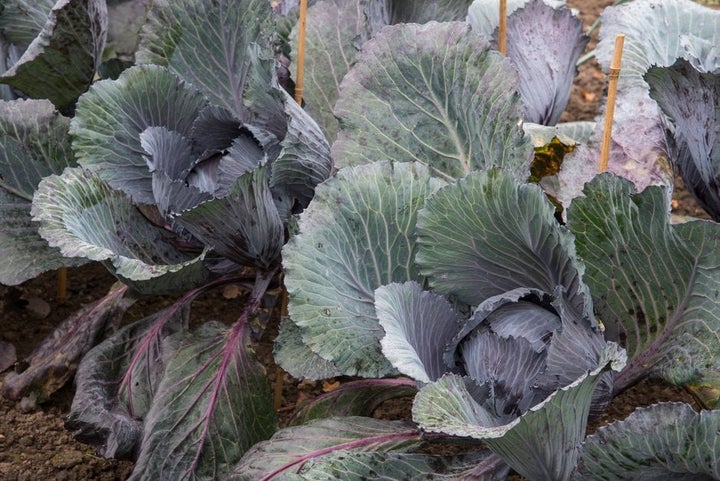
There are many cabbage varieties to choose from, grouped according to their harvesting season (see above). They come in various shapes, from pointed to rounded, some with loose heads, others tight and dense. They can be all shades of green, as well as attractive steely blue, deep purple or tinged with red. Cabbages vary in size too, with compact varieties that are ideal for small plots or small households. Winter varieties, on the other hand, tend to be large and more robust.
When choosing varieties, look in particular for those with an RHS Award of Garden Merit (AGM), which shows they performed well in RHS trials – see our list of AGM fruit and veg (135kB pdf) and our Recommended Varieties below. Several are resistant to club root and/or downy mildew, so are good choices if you’ve previously had these diseases on your veg plot.
You can also see cabbages and many other crops in the veg areas at all the RHS gardens, so do visit to explore how they’re grown, compare different varieties and pick up useful tips and inspiration.
What and where to buy
Cabbage seeds are widely available in garden centres and from online seed suppliers. Young plants may also be available in spring and summer from the same sources. Buying young plants may be a good option if you only want to grow a few cabbages, but they’re more expensive than seeds and the choice of varieties is more limited.
Recommended Varieties

'Winterjewel' AGM
Spring cabbage with smooth, dark green leaves – can be cut as spring greens or left to develop loose hearts.

Preparing The Ground
Choose a sunny growing site with fertile, free-draining soil, where you haven’t grown cabbages or other brassicas in the previous couple of years. Avoid ground that gets , especially during winter if growing an overwintering variety. If your soil is very acidic, apply lime the winter before sowing, to raise the above 6 and deter club rootdisease – you can carry out a simple pH test to check if this is necessary. Cabbages should be positioned alongside their fellow brassicasin crop rotations, to reduce the potential build-up of problems in the soil.
As cabbages like rich, fertile soil, add two buckets of garden compost per square metre/yard. This is best done the previous autumn, so you can leave it over winter to consolidate, as cabbages also like firm ground. If you add the just before sowing or planting, take care to firm the soil by shuffling across the surface on your heels. Remove any weeds then rake the surface level, creating a fine, crumbly texture ready for sowing/planting. Alternatively, if you're practicing no-dig, the soil with organic matter ahead of sowing or planting directly into the mulch.
Sowing
Cabbages are easy to grow from seed sown indoors or outside. Avoid sowing too many seeds at one time though – instead sow several small batches through spring and summer to spread out your harvests and avoid gluts.
Sowing indoors
Sowing indoors is a good way to get cabbages off to an early or more reliable start, out of reach of slugs and snails. It can also reduce the effects of club root, if you have this fungal disease in your soil. Sowing times vary from late winter to summer, depending on the variety, so check your seed packet for full details.
Ideally sow the seeds in modular trays to reduce root disturbance when transplanting outside. Fill with peat-free , water to dampen thoroughly, then sow two seeds per module, 2cm (¾in) deep. Keep them in a greenhouse or on a bright windowsill.
Thin out the young , removing the smaller or weaker one, to leave one per module. Keep in good light and water regularly. After about five weeks, when the plants are 10–15cm (4–6in) tall with a good root system, move them outdoors – see Planting, below.
Sowing outdoors
Traditionally, cabbages are sown in a separate ‘seedbed’, then later moved to their final growing site on the main veg plot. This is because they grow quite slowly and often need wide spacing, so would take up a lot of room during the prime growing season. However, you can sow straight into the final growing site if you prefer, then transplant any overcrowded plants to new rows later, to create the necessary wider spacing.
You can sow seeds outdoors from late winter to late summer – timings depend on the type of cabbage:
- February–April for summer cabbages (protect early sowings with cloches or biodegradable fleece)
- April–June for autumn and winter cabbages
- August for spring cabbages
Prepare the ground as detailed above, then make a about 2cm (¾in) deep and water along the base. If sowing in a seedbed, sow the seeds as thinly as possible, ideally 10cm (4in) apart – or thin out to this distance once appear. If sowing in their final position, sow three seeds every 30–45cm (12–18in), depending on the variety (check seed packets for spacings), then thin out each cluster to one strong seedling as soon as they’re large enough to handle. Protect the seedlings from slugs and snails and cover with insect-proof mesh (see Problems, below).
Alternatively, if you’re short on ground space during the prime spring sowing season, you could sow in modular trays outdoors (using the method described in Sowing indoors), for transplanting into the ground later.
Sowing as microgreens
Cabbage seeds can also be sown as microgreens on a sunny windowsill, for a quick, nutritious crop of to add to salads. Red varieties are especially decorative. Sow the seeds at any time of year into a small seedtray of damp peat-free . Water regularly, and in just a few weeks you’ll have a crop of tasty leaves.
Planting
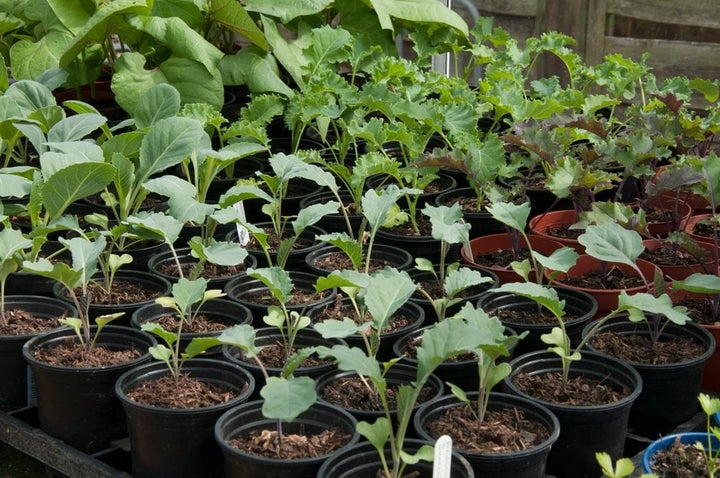
Young cabbages, either growing in a seedbed, raised from seed indoors or bought as plug plants, should be moved to their final growing site when they’re 10–15cm (4–6in) tall, with five or six true leaves. Make sure to harden off indoor-sown plants before transplanting, to avoid a check in growth.
Choose and prepare your planting site as detailed above and water the plants well the day before moving. Carefully lift them or remove them from their or pots without disturbing the roots, then set them in their new planting hole more deeply, with their lowest leaves at the soil surface. Firm them in well and water generously.
The spacing between plants depends on the type and ultimate size of the cabbages, so check seed packets for details. But as a general rule, space compact varieties 30cm (1ft)apart and larger varieties up to 45cm (18in) apart. With spring cabbages, space them initially 10cm (4in) apart, then thin out in late February or March to 30cm (1ft), using the thinnings as spring greens. Protect young plants from slugs and snailsand cover with insect-proof mesh or biodegradable fleece to avoid insect damage.
Planting in containers
Although cabbages grow best in the ground, you can also plant them in large, deep containers filled with peat-free multi-purpose . This is a useful option if you have club root disease in your soil, or are short on ground space. Choose a compact variety and plant deeply, in a similar way to planting in the ground. Plant one in a 30cm (12in) pot, or up to three in a 50cm (20in) pot. Cabbages need plenty of light and good airflow to grow well and to avoid fungal diseases, so don’t be tempted to plant more densely. Cabbages aren’t suitable for growing bags. Position the container in a sunny spot and keep it well watered, especially in summer.
Plant Care
Cabbages generally grow slowly and steadily, as long as they’re protected from insect and bird damage and given consistent moisture. Remove any faded outer leaves regularly, to maintain good airflow around the plants, which helps to deter fungal diseases.
Watering
Young cabbage plants only have a small root system, so water them regularly to keep them growing strongly. Once they’re well established, cabbages generally only need watering during dry spells, when you should give the ground a thorough soaking every 10 days. Once the heads begin to form, additional watering will help to increase their size. See our water-saving tips below.
Mulching
Apply a thick of well-rotted manure or garden compost around cabbage plants to hold moisture in the soil and reduce the need for watering. This will also help to suppress weeds.
Feeding
If your soil is poor and your plants need a boost, you could consider applying a nitrogen-rich fertiliser, which will encourage strong leafy growth. This is best done once the plants are settled into their final growing position, but before they form hearts. With spring cabbages, apply in early spring to aid new growth.
Weeding
Keep young cabbage plants free of weeds by regularly, so they don’t have to compete for light, water and nutrients. See our tips on controlling weeds.
Protecting the crop
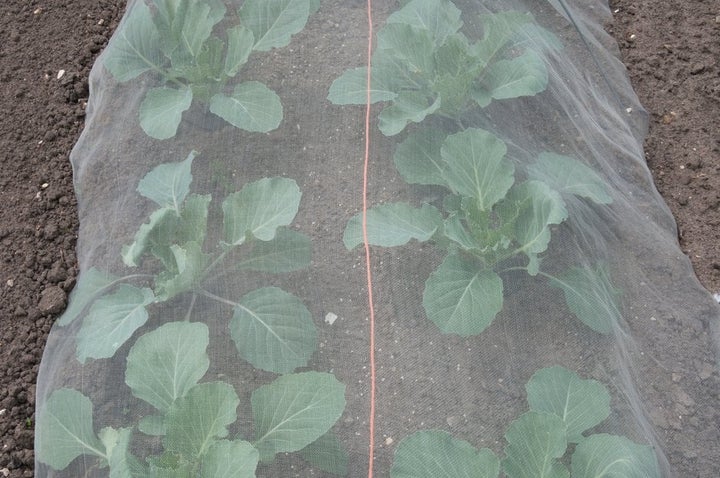
It’s best to keep cabbages covered with insect-proof mesh, supported on hoops or bamboo canes, to avoid damage by various brassica-loving creatures, including cabbage caterpillars and pigeons. See Problems, below, for more tips.
Harvesting
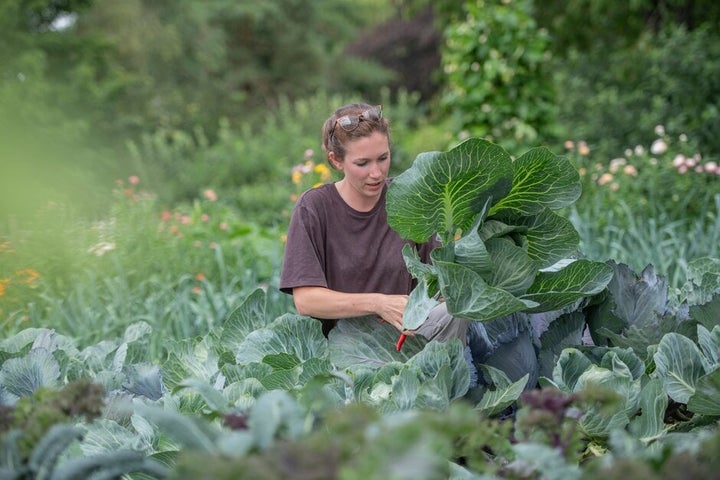
You can harvest cabbages all year round if you sow a selection of spring, summer, autumn and winter varieties. Plants generally take about four to six months to reach maturity, depending on the type, and are ready once they’ve formed a firm head that’s the size you want. If you harvest every other cabbage along the row initially, this allows the remaining ones to grow larger, if need be. Mature cabbages can be left standing for a few weeks, but will eventually deteriorate, so check them regularly.
To harvest, cut through the stem just above ground level with a sharp knife. With spring and summer cabbages, if you then score a 1cm (½in) deep cross in the stump, they should go on to produce a second, smaller cabbage. Once the crop is finished, dig out the stumps to deter the spread of brassica diseases.
Cabbages can be eaten raw or cooked, and are a key ingredient in many popular dishes, including coleslaw, sauerkraut and kimchi. They are great in stir-fries and easy to sauté or steam, and can be used in soups, stews and other hearty meals. As well as being tasty, cabbage is rich in vitamins, minerals, antioxidants and fibre.
Cabbages are best eaten soon after harvesting but will keep well in the fridge for at least a week. Some winter cabbages can be stored for several months in a cool, dry, frost-free place.
Problem Solving
Although cabbages are generally hardy and vigorous plants, they can be damaged by several brassica-loving creatures and are susceptible to various brassica diseases – for prevention tactics and more details, see Common problems, below.
Common Problems

Cabbage caterpillars
Cabbages and other brassicas are a food source for the caterpillars of several species of moth and butterfly.

Cabbage root fly
The maggots of cabbage root fly eat the roots of cabbages and other brassicas, they can also tunnel into the roots of swedes, turnips and radish.


