Getting Started
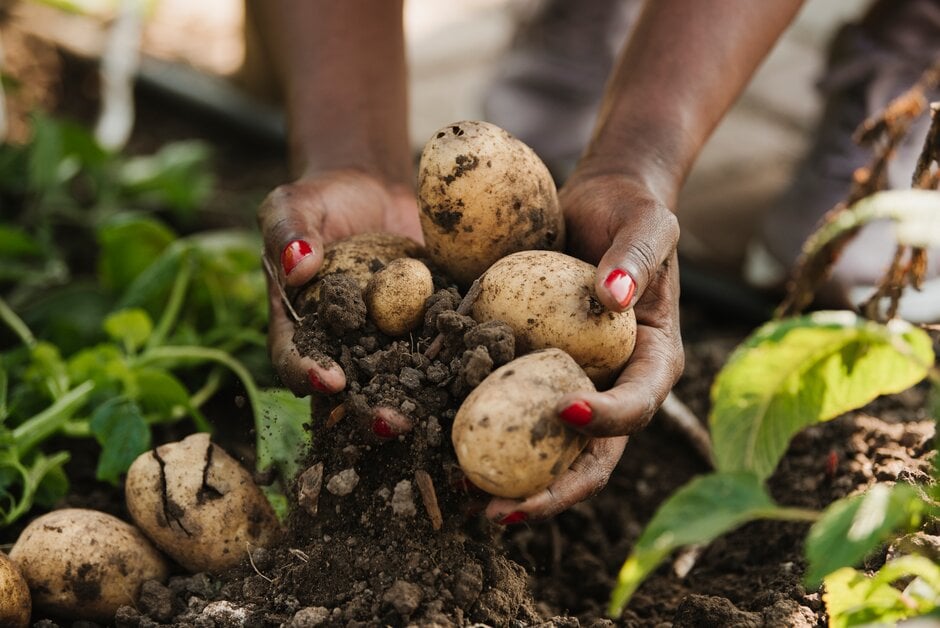
Potatoes are a traditional veg plot staple, easy and fun to grow, producing plentiful crops in summer and autumn. Whether you’re new to growing potatoes or have been doing it for years, digging up your buried bounty is always a thrill.
The humble spud (Solanum tuberosum) comes in a surprisingly diverse range of varieties, giving gardeners a choice of flavours and textures not offered in supermarkets. Most varieties are classed as either earlies (new potatoes) or maincrops, depending on when they’re ready to harvest. Earlies are further divided into first or second earlies.
Potatoes are grown from specially prepared ‘seed potatoes’ (small tubers), usually planted in spring. With early varieties, the seed potatoes can be ‘chitted’ (encouraged to sprout) before planting, to produce an earlier crop. As the plants grow, soil can be gradually piled up around the stems, known as , to bury the developing tubers. If you don’t have room for a whole row of potatoes, you can grow just a few in a small bed, large container, or even a sack or a bag.
Potatoes are usually easy and reliable croppers, but they can be affected by several diseases, the most notorious being potato blight. However, this is less likely to affect early varieties and is less prevalent in dry summers.
Jobs to do now
Earth up
Harvest
Water in dry spells
Month by Month
Plant
Harvest


Choosing What To Grow
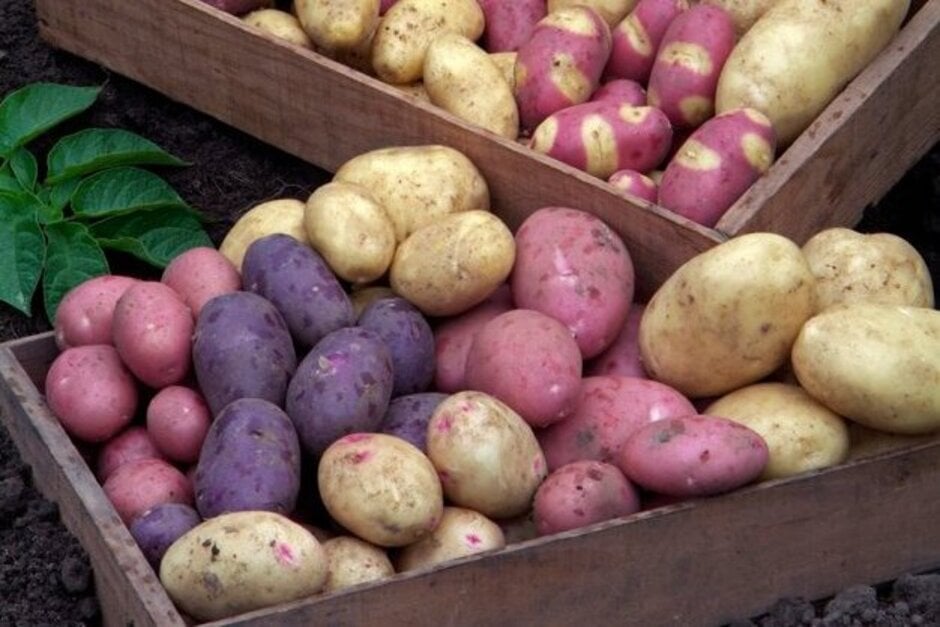
There is a huge range of potato varieties to choose from, so it’s well worth trying out some of this rich diversity. There are different flavours, textures (waxy or floury), sizes and colours (white, yellow, pink, red or even purple) to discover, with traditional heritage varieties and new disease-resistant options, for various growing conditions and culinary uses. Potato varieties are classed as either earlies or maincrops:
- Early varieties (first or second earlies) – are ‘new potatoes’, small and delicious. They’re faster growing, ready to harvest in as little as 12 weeks. The plants take up less space, so are useful in smaller plots, and can be grown in containers. As they’re harvested by midsummer, they free up space for a later crop, such as courgettes or beans
- Maincrop varieties are in the ground a lot longer, through to late summer or early autumn. They produce a larger harvest and bigger individual potatoes, ideal for roasting and baking, and can be stored for use in winter
When choosing, look in particular for varieties with an RHS Award of Garden Merit (AGM) – these performed well in trials, so should grow and crop reliably for you. See our list of AGM fruit and veg (135kB pdf) and our Recommended Varieties below. You can also see many crops, including potatoes, growing in the veg areas at all the RHS gardens, so do visit to see how they’re grown, compare the varieties and pick up useful tips.
What and where to buy
Potatoes should be grown from specially prepared ‘seed potatoes’ (small tubers) that are certified virus-free, to give you healthy, vigorous plants. You can buy seed potatoes in late winter and spring in garden centres and online. Mail-order suppliers offer the widest choice of varieties and most allow you to order in advance, as popular varieties may sell out. To grow a Christmas crop in a greenhouse, buy cold-stored tubers in summer.
Recommended Varieties

'Red Duke of York' AGM
First early – red skin and pale yellow, floury flesh. Excellent flavour, a good all-rounder.

'Sharpe's Express' AGM
First early – suitable for containers. Smooth skin and pale flesh with good flavour.

'Sarpo Mira' AGM
Late maincrop – red skin, pale flesh. Good for all uses. Stores well. Good resistance to blight and slugs.


Preparing The Ground
Potatoes need an open, sunny growing site, not prone to late frosts, as the young shoots are susceptible to frost damage in April and May.
They like rich, fertile soil, so dig in plenty of organic matter, such as garden compost or well-rotted manure, before planting. If possible, do this the previous autumn or winter. Alternatively, you can apply a 10cm layer of garden or well-rotted manure after planting the potatoes – ideal for a no-dig veg plot. Adding organic matter will feed your soil, but you can also apply an organic-based, general-purpose fertiliser to the ground, to increase yields where needed.
Planting
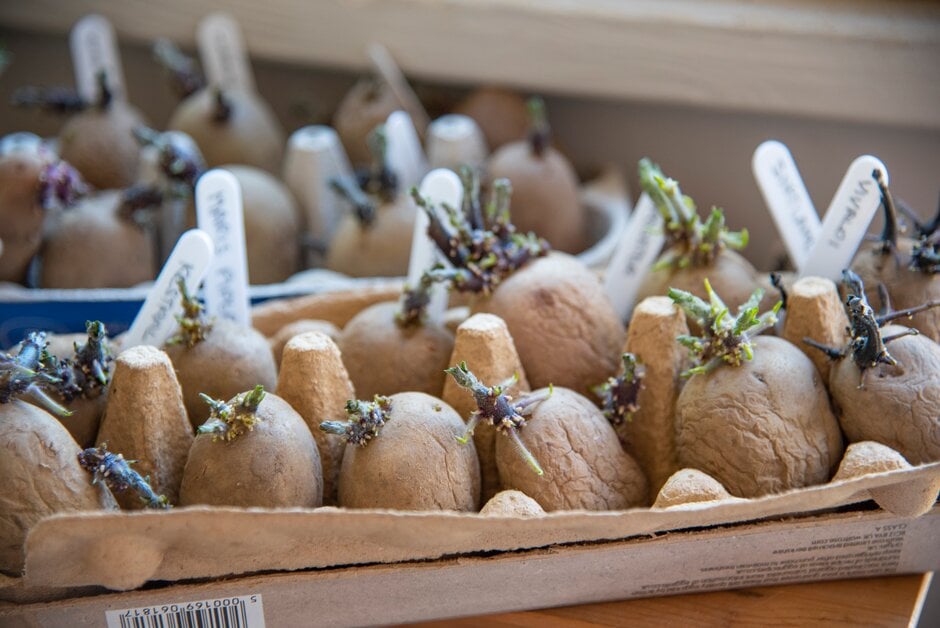
Before planting your seed potatoes, you can give them an early start by ‘ ’ (sprouting) the tubers, so growth gets underway more quickly.
Chitting potatoes
allows seed potatoes to start sprouting before you plant them. It’s not essential, but is worthwhile with early varieties to get them off to a head start, so they produce an even earlier crop. For both first and second early varieties, start chitting in late January in milder areas and up to early March in colder spots – the process takes four to six weeks. More information on chitting can be found in our guide to growing potatoes successfully.
If you don’t have the time or space to chit your early seed potatoes, they will still grow perfectly well, but will just take a few weeks longer to crop. There’s no real advantage to chitting maincrop varieties, as they grow over a much longer period.
When to plant
Potatoes are mainly planted in spring, over several weeks, according to the type of variety:
- First earlies – plant around late March
- Second earlies – plant in early to mid-April
- Maincrops – plant in mid-April to early May
The timing also depends on where you are in the country – plant slightly later in colder regions and earlier in milder ones. There are also a couple of other planting options, to extend the cropping season:
- To grow an extra early crop – plant chitted seed potatoes of early varieties at the beginning of March, into large containers in a frost-free greenhouse. Keep them indoors in good light for a crop by about mid-May
- To grow a winter/Christmas crop – plant prepared (cold-stored) seed potatoes in July or early August, into a large container in a greenhouse or bright frost-free location. Keeping them indoors also protects them from blight
Planting in the ground
To plant, dig a trench 15cm (6in) deep, place the seed potatoes along the base with the sprouts upwards. Cover with at least 2.5cm (1in) of soil, taking care not to damage the sprouts, and water well. Alternatively, you can dig individual holes for each seed potato.
- Earlies – plant 30cm (1ft) apart, in rows 60cm (2ft) apart
- Maincrops – plant 37cm (15in) apart, in rows 75cm (30in) apart
Try to grow potatoes in a different area of your veg plot each year. Practicing crop rotation helps to avoid build-ups of diseases and other problems in the soil.
If you're a no-dig gardener, you can shallow-plant the seed potatoes, then add a deep layer of organic matter on top. The crop is then easy to harvest by simply pulling the potatoes out of the .
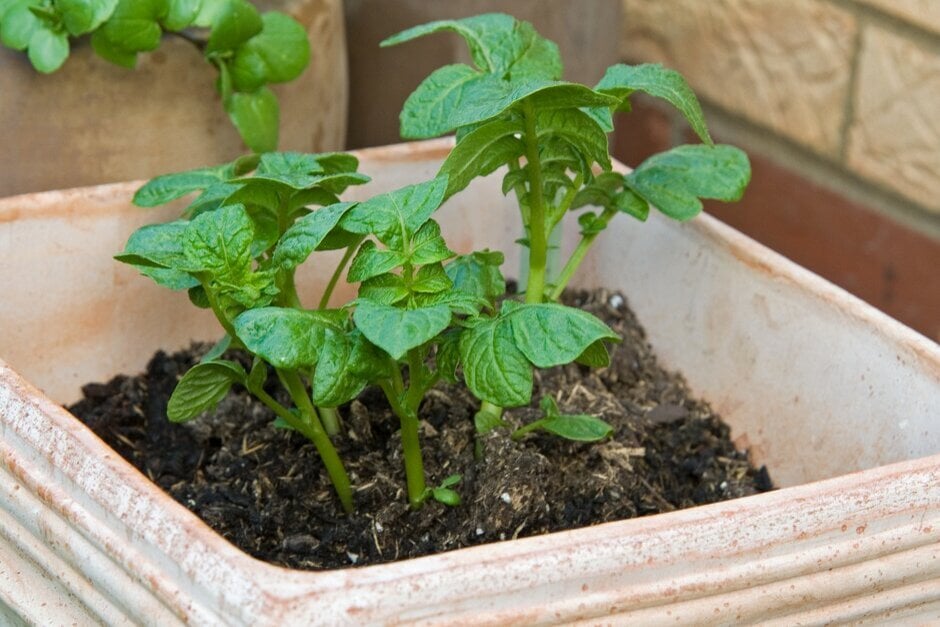
Planting in containers
If you don’t have space in the ground, you can grow potatoes in large containers, where they’ll produce a decent crop. Early varieties are the most suitable, as the plants are smaller and mature more quickly. Choose a container at least 30cm (12in) wide and deep, and half-fill with 15cm (6in) of peat-free multi-purpose compost. Plant one seed potato per 30cm (12in) of pot diameter, setting them just below the surface. Once shoots start to appear, add more gradually as they grow, until the compost level is just below the rim.
You can also grow a good crop in potato grow bags or grow sacks – some are available with openings near the base, for easy harvesting. You can also repurpose old sacks or large compost bags, but be sure to pierce holes in the bottom of bags to allow excess water to drain out.
Plant Care
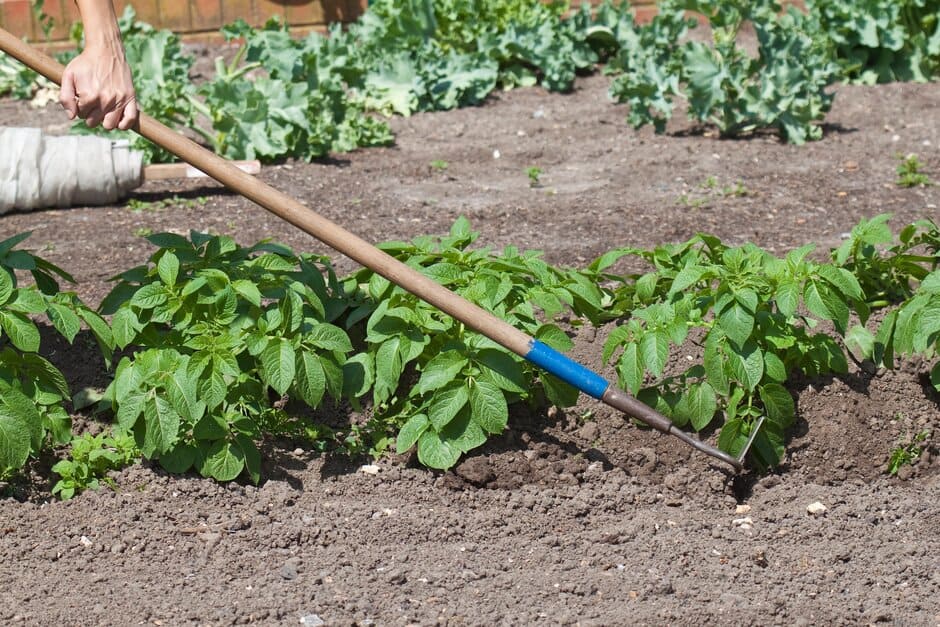
Earthing up potatoes
Potato plants are traditionally ‘earthed up’, which means mounding up soil around the stems as they grow. This protects the shoots from frost damage in late spring and ensures the developing potatoes aren’t exposed to light, which turns them green and inedible. It’s a simple process – once the shoots are about 23cm (9in) tall, draw soil up around them to form a ridge along the row, leaving just the top 10cm (4in) of the plants visible. As the stems grow taller, repeat the process several times, a few weeks apart. The final height of the ridge should be 20–30cm (8–12in). But if you are unable to earth up, or don’t have time, you should still get a good crop.
Follow a similar process for potatoes in containers. From half-full at planting time, gradually add more potting as the stems grow.
Watering
To ensure a good crop, water potato plants in dry weather. Potatoes in containers need regular watering throughout the , especially if kept in a greenhouse. Even during wet weather it may be necessary to water outdoor containers, as the leaves can act like an umbrella over the , preventing rainwater soaking down.
Feeding
Potato plants growing in the ground don’t generally need feeding, but on poor soil, maincrop potatoes benefit from a nitrogen-rich organic fertiliser around the time of the second . See the Preparing the Ground sectionfor information on adding before planting.
Potatoes grown in containers will need feeding, so either mix an organic general-purpose fertiliser into the before planting, or use an organic liquid feed when nutrient levels in the compost start to get low (after about six weeks for many peat-free multi-purpose composts).
Weeding
Weed regularly for the first month or two after planting, so the young plants don’t have to compete for light, water and . Once potato plants are growing strongly and have plenty of leaves, weeding isn’t usually necessary as they will generally shade out any competition. Repeated also helps to deter weeds.
Protecting from frost
Frost can damage young potato plants, so if freezing temperatures are forecast after shoots have appeared, protect them with a cloche or some hessian or straw overnight, or cover with soil or garden . With plants in containers, keep them in a frost-free place such as a greenhouse until there’s no longer any risk of frost outdoors.
Harvesting
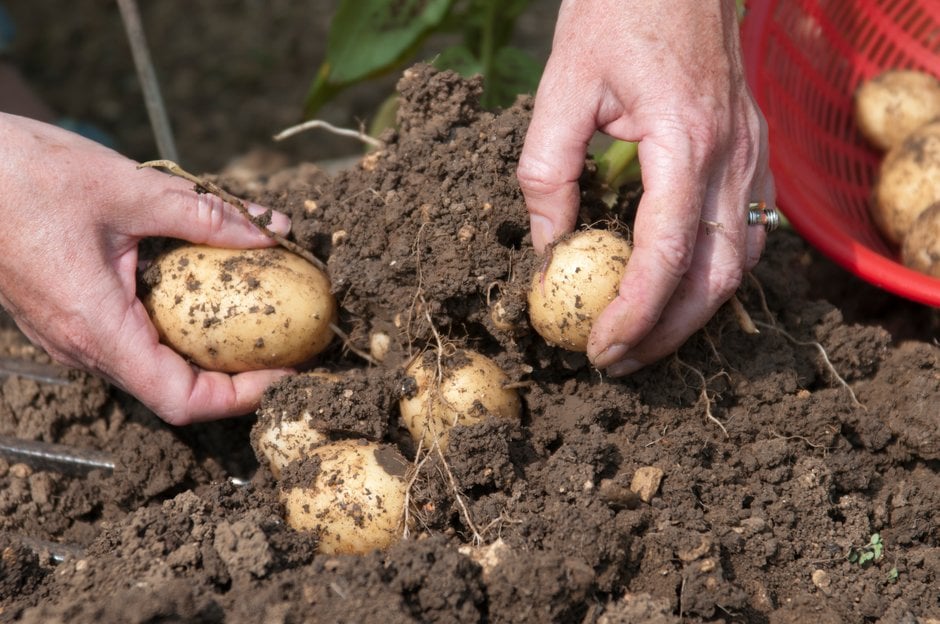
Harvesting potatoes is the really fun part – carefully lifting your plants to discover the size of your underground treasure is a thrill that never fades, however many years you’ve been growing potatoes. But it can be difficult to judge when to harvest, as the crop isn’t visible. So before you dig up your first plant, gently scoop away some of the soil to check on the size of the tubers. Cover them again if you decide they’re not yet big enough.
Early potatoes and maincrop potatoes mature at different times over the summer. Harvest times can also vary across the UK and from year to year, depending on the weather. But as a general guide:
- First early varieties should be ready to lift in June and July
- Second earlies in July and August
Harvest earlies when the flowers are open or the buds drop. The tubers should be the size of hens’ eggs.
- Maincrop varieties from late August through to October
Start lifting maincrops in late summer for immediate use. If they are healthy, you can leave them in the ground until mid-autumn to bulk up.
Dig up potatoes carefully, inserting your fork at least 30cm (1ft) away from the base of the plant to avoid spearing the tubers. Discard any potatoes that are green, as they’re potentially poisonous. If you only want a few potatoes at a time, try digging down carefully beside a plant with a trowel – you should be able to remove a few individual potatoes without disturbing the plant’s roots, so it can continue growing.
Potatoes grown in containers are really easy to harvest, without the risk of accidentally damaging them – gently tip out the contents and simply pick out your potatoes by hand.
Early potatoes are best used as soon as possible after harvesting. Maincrops can either be used fresh or stored for several months and eaten gradually when needed through the winter. If you want to store maincrop potatoes, delay harvesting until the leaves turn yellow, then cut off and remove all the top growth. Wait for 10 days, then dig up the tubers and leave them in the sun for a few hours to dry, then brush off the soil.
Storing
Maincrop potatoes usually store successfully for several months. Only store undamaged potatoes – ensure they are dry and brush off any soil before storing. Keep them in a dry, cool, frost-free place, such as a garage, in paper or hessian sacks or on slatted trays in the dark (to prevent sprouting). Check them every few weeks for signs of rotting. Aim to finish them before early spring, as they’ll start to sprout and shrivel.
Problem Solving
Potatoes are easy to grow and usually produce a large, reliable crop. However, they can be affected by several diseases or be eaten by various soil-dwelling creatures such as slugs, which particularly like to tunnel into maincrop tubers during damp autumn weather. Blight can be a wide-spread problem in some summers, depending on the weather, but you can still usually harvest and eat the crop if you act quickly, although the potatoes won’t be suitable for storing.
To avoid the build-up of problems in the soil, grow potatoes in a new position each year – see our guide to crop rotation. Some potato varieties are also less susceptible to certain diseases. See Common problems below for more advice on tackling the main growing issues.
Common Problems

Plant viruses
Plant viruses affect many plants and cause a wide range of discolourations and distortions in leaves, shoots, stems and flowers, but rarely kill the p...

Potato blight
Potato blight, also known as late blight to distinguish it from a different potato disease called early blight, attacks the foliage and tubers of pota...

Potato black scurf and stem canker
Black scurf is a fungal disease producing hard, black growths on the surface of tubers that can be rubbed off. Although unsightly it is not destructiv...


