Getting Started
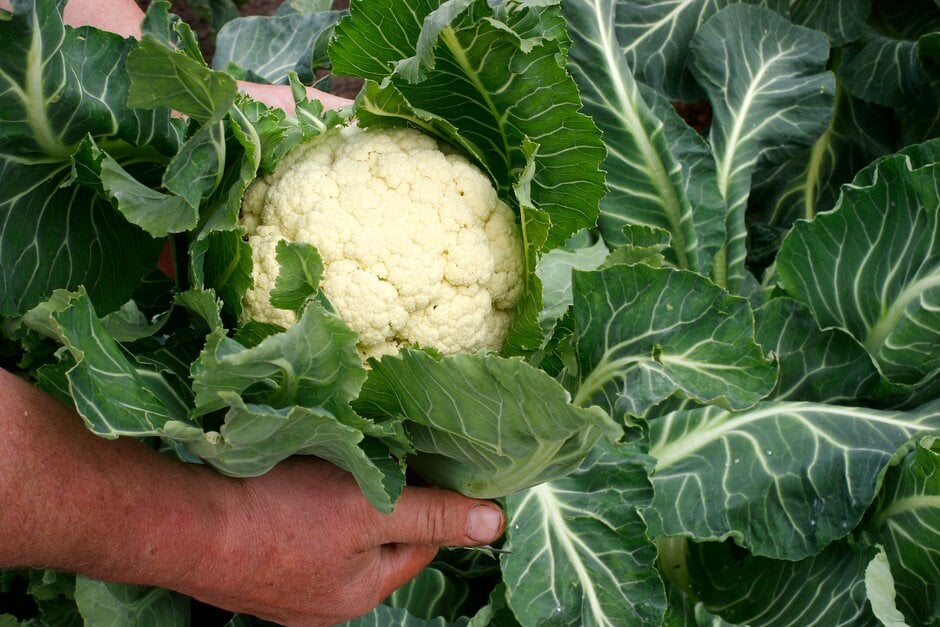
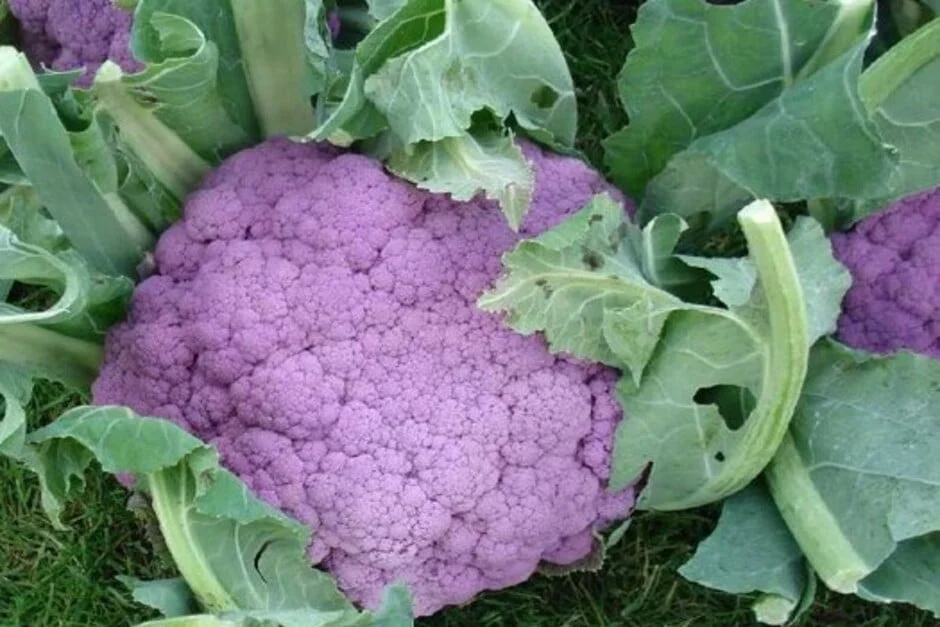
Cauliflowers form large-leaved plants with a single head (curd) in the centre, which is the immature flower cluster, harvested while still in tight . Although traditionally white, you can also grow orange, green or purple varieties, as well as handy mini caulis. You can use your home-grown harvests in soups, curries and classic cauliflower cheese. You can also grate them to make low-carb ‘cauliflower rice’, and enjoy the crunchy raw florets in salads or with dips.
Cauliflowers are usually grown from seed, sown either indoors or outside, and need sun and fertile, moisture-retentive, well-firmed soil. They are usually best sown indoors, then outdoors after about six weeks. They have a reputation for being tricky to grow – the key to success is to prevent any checks in their growth. They like cool, damp weather and tend to bolt or form small or deformed heads in hot or dry conditions. Summer and mini varieties are faster growing and less likely to encounter problems, so are a good option if you’re new to growing cauliflowers.
As cauliflowers are brassicas, they are prone to damage by various brassica-loving insects and pigeons, so it’s best to cover the crop with fine insect-proof mesh. They should be grown with other brassicas in crop rotations.
Jobs to do now
Sow seed outdoors
Plant out
Harvest
Water in dry spells
Month by Month
Sow
Plant Out
Harvest


Choosing What To Grow
There are lots of cauliflower varieties to choose from, traditionally grouped according to harvesting time, with faster-growing and generally less hardy varieties for summer and autumn crops, and slower-growing, hardier varieties for harvesting in late winter and spring. Newer varieties often have an extended sowing and cropping period, so may overlap these traditional groupings:
- Early-summer varieties – these are usually sown indoors in winter, then planted out in spring under cloches. They grow quickly and are ready to harvest in early summer
- Summer/autumn varieties – these are popular types. Sown from early spring indoors, or outdoors from mid- to late spring. They’re ready to harvest from late July to October, and sometimes into November, although they should be harvested before the first frost
- Winter/spring varieties – these are sown indoors or outdoors from late spring to early summer. They are slow growing, taking six months or more to mature, and form large heads, potentially up to 30cm (1ft) wide. They need wide spacing and can take up quite a lot of room over a long period. Most modern varieties are very hardy and can be harvested well beyond winter, into spring and even early summer
You can also choose more compact or more colourful varieties:
- Mini cauliflowers – these are mainly summer varieties, grown at closer spacing to keep them small, and harvested when they are the size of a tennis-ball. They are ideal if space is limited or you only want small servings, and they can even be grown in containers. They are relatively quick to mature, in as little as three months, and less prone to problems
- Coloured varieties – there are several varieties with orange or purple heads, as well as romanesco types that produce a green head with peaked florets. These are mainly summer/autumn varieties
When choosing cauliflowers, look for varieties with an RHS Award of Garden Merit (AGM), which shows they performed well in trials – see our list of AGM fruit and veg (135kB pdf) and our Recommended Varieties below. You can see many crops, including cauliflowers and other brassicas, growing in the veg plots at the RHS gardens, so do visit to explore how they’re grown, compare the varieties and pick up useful tips and inspiration.
What and where to buy
Cauliflower seeds are widely available in garden centres and from online seed suppliers. Young plants may also be available in spring and early summer from the same sources, although the choice of varieties will be more limited.
Recommended Varieties

‘Clapton’ AGM
Autumn variety – resistant to club root, with large white heads that have an excellent flavour.

'Moby Dick' AGM
Autumn/winter variety – white head and strong foliage that protects the head from early frosts.

'Raleigh' AGM
Summer/autumn variety – copes well in stressful conditions and is resistant to ‘pinking’.


Preparing The Ground
Choose a sunny site with deep, fertile soil that is moist but free-draining. Make sure you haven’t grown cauliflowers or other brassicas in that spot for at least two years – see our guide to crop rotation.
It’s best to start preparing the soil well ahead of sowing or planting if possible. Dig in a couple of bucketfuls of well-rotted manure or garden compost per square metre/yard, ideally the autumn beforehand so the ground has time to settle, as cauliflowers like firm ground. If you add just before sowing or planting, firm the soil by shuffling across the surface. Remove any weeds then rake the surface level, creating a fine, crumbly texture ready for sowing/planting.
Alternatively, if you're practicing no-dig, the soil with organic matter ahead of sowing or planting directly into the mulch.
If your soil is acidic, apply lime the previous winter to raise the and deter club root disease – you can carry out a simple pH test to check if this is necessary. Cauliflowers grow well in soil with a pH of about 6.5.
Sowing
Cauliflower seeds are usually sown indoors, but can also be sown outdoors from mid- to late spring. The main sowing season is March to May, although you can sow in January or February indoors – or even the previous autumn – for earlier harvests. As cauliflowers tend to mature in a rush, avoid raising too many plants at a time, as they don’t store well. Sowing several small batches about three weeks apart will spread out your harvests.
Sowing indoors
Starting cauliflowers off in a greenhouse or on an indoor windowsill gives more reliable results, as the temperature can be controlled and the are out of reach of slugs and protected from harsh weather. Sowing times vary, depending on the variety and harvesting time:
- Sow early-summer varieties in mid- to late winter
- Sow summer/autumn varieties in spring
- Sow winter/spring varieties in late spring to early summer
Sowing seeds individually in modular trays helps to reduce root disturbance when transplanting. Use peat-free , water to dampen thoroughly then sow the seeds about 1.5cm (¾in) deep. Keep at 12–22°C (54–72°F). For more sowing tips, see our guides below.
Cauliflower seeds should germinate in about two weeks. Keep the seedlings warm and in good light, and water regularly. They will be ready to transplant outdoors in about six weeks, as soon as their roots fill the module – see Planting, below.
Sowing outdoors
Like many brassicas, cauliflowers are traditionally started off in a separate ‘ ’, then to their final growing position, at a wider spacing, once they’re about 10cm (4in) tall. This helps to make the best use of limited space during the prime . However, you can sow straight into the final growing site if you prefer, then transplant any overcrowded plants to new rows later, to create the necessary wider spacing.
- Sow summer/autumn varieties outdoors in mid- to late spring
- Sow winter/spring varieties outdoors from late spring to early summer
Choose and prepare the sowing site as outlined above in Preparing the ground. Make a shallow about 1.5cm (¾in) deep and water along the base if dry.
If using a seedbed, sow the seeds thinly along the drill, 10-15cm (4-6in) apart, or thin out the to that spacing if sown more thickly. If sowing more than one row, space the rows at least 15cm (6in) apart. Young plants will be ready to move to their final growing site about 6 weeks after sowing (see Planting).
If sowing in their final position, sow three seeds along the drill every 45–70cm (18–28in), depending on the variety (check seed packets), or every 15cm (6in) for mini caulis. After , thin out each cluster of seedlings to leave just one at each point. Space rows 60-70cm (24-28in) apart.
For more sowing tips, see our guides below.
Planting
Young cauliflower plants – either growing in a , raised from seed indoors or bought as – should be moved to their final growing site when 10–15cm (4–6in) tall, at about six weeks old. Indoor-raised plants must be hardened off before transplanting, to gradually acclimatise them to outdoor conditions.
Choose a suitable site and prepare it carefully, ideally well ahead of planting – see Preparing the ground, above. It’s important to give cauliflowers plenty of space, especially larger winter varieties. Wide spacing helps them grow bigger and keeps them healthier by allowing good air circulation and preventing any shading. Mini cauliflowers are the exception and are planted closer to restrict their growth. Use the following spacings:
- Summer/autumn varieties – 45–60cm (18–24in) between plants, 60cm (24in) between rows
- Winter/spring varieties – 70cm (28in) between plants, 70cm (28in) between rows
- Mini caulis – 15cm (6in) between plants, 15cm (6in) between rows
Water your young cauliflower plants ahead of moving them, then carefully lift them from the seedbed or remove them from their modular tray, trying not to disturb the roots. Set them in their new planting holes more deeply than before, with the lowest leaves at the soil surface, so they root in deeply. Backfill with soil, firm in and water well.
Protect young cauliflower plants from slugs and snails, and cover the plants with insect-proof mesh to deter various brassica-loving insects and birds – see Problems, below.
Planting in containers
Mini caulis can also be grown in large, deep pots – plant up to four in a 40cm (16in) diameter container filled with peat-free multi-purpose . Position them deeply, with their lowest leaves at the surface of the compost, and water well. Stand the container in a bright, sheltered spot, and continue watering whenever necessary to prevent the compost drying out, especially in summer.
Plant Care

Cauliflowers require a steady supply of moisture to form well-shaped heads. Hot summer sun can cause white cauliflower heads to turn yellow – to protect them, snap and fold in the leaves to cover the curd. In winter, bunch and tie leaves together over the curd to protect it from hard frosts.
Watering
Cauliflowers grow best in soil that is damp at all times, but not . Dry soil may cause them to stop growing and the head may not form correctly. and young plants in particular need regular watering until they’ve developed a deep root system. Consistent moisture is also important while the curds are starting to form, so they reach a good size.
Cauliflowers are a thirsty crop, but you don't need to use lots of mains water to grow them well. You can water cauliflowers with collected rainwater and reduce the need to water by weeding, mulching and preparing the ground well. See our guides below for more water-saving tips.
Mulching
Apply a thick layer of , such as well-rotted manure or garden compost, to help hold moisture in the soil and reduce the need for watering. This will also help to suppress weeds. Just be sure to leave a small gap around the base of the stems.
Feeding
Feeding is not generally needed, but if your soil is poor, you could consider feeding young cauliflower plants before they start to form heads with an organic-based, nitrogen-rich fertiliser.
Weeding
Keep cauliflower and young plants weed-free, so they don’t have to compete for light, water and . Dense weeds can also harbour slugs and snails.
Protecting from frost
In spring, protect young cauliflowers from frostwith clochesor biodegradable fleece, as cold temperatures can lead to bolting (premature flowering), which reduces the crop. With overwintering varieties, protect the head from hard frosts by covering with layers of and/or folding some of the leaves over the head and securing with string.
Harvesting
You can harvest cauliflowers throughout the year, depending on when you sow. They generally take three to six months from sowing to maturity, but growth rates vary according to the variety, size and weather conditions.
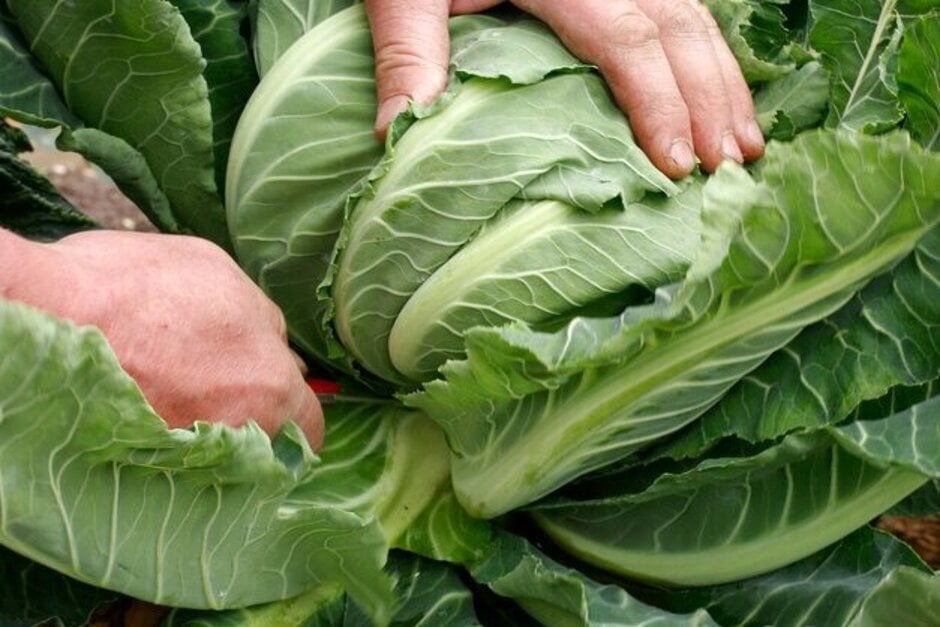
Harvest cauliflowers as soon as the head is large enough, when still firm and compact. Don’t wait too long though – once the head starts to separate, it’s past its best and will taste bitter. White varieties should be harvested before they turn yellow. Mini cauliflowers can be harvested at tennis-ball size. A row of cauliflowers, if sown at the same time, will often mature all at the same time, leading to a glut. So it’s best to start harvesting before they reach full size, to spread the crop over a longer period. To harvest, cut the stem with a knife, taking the head and a few of the leaves beneath it, to protect the curd.
Cauliflowers are best eaten fresh, but can be stored in a fridge for several days – they keep better with a few leaves intact. Cauliflower florets can also be blanched then frozen.
Problem Solving
Cauliflowers have a reputation for being tricky to grow successfully, but they should be fine if you take care to provide the right growing conditions – firm, fertile soil and consistent moisture. If not, you may encounter the following issues:
- Deformed or button heads or bolting (premature flowering) – these can be caused by various conditions that lead to a check in growth, including root disturbance due to transplanting too late, loose soil, irregular or insufficient water, cold temperatures in spring and/or hot weather in summer
- Discoloured heads – protect the developing curds from sun and frost, which can turn them yellow or brown, by folding the leaves over the head and tying in place with string if necessary
Cauliflower plants can also be damaged by various brassica-loving creatures, and are susceptible to several brassica diseases – for prevention tactics and more details, see Common problems, below.
Common Problems


Cabbage caterpillars
Cabbages and other brassicas are a food source for the caterpillars of several species of moth and butterfly.

Cabbage root fly
The maggots of cabbage root fly eat the roots of cabbages and other brassicas, they can also tunnel into the roots of swedes, turnips and radish.


