Getting Started
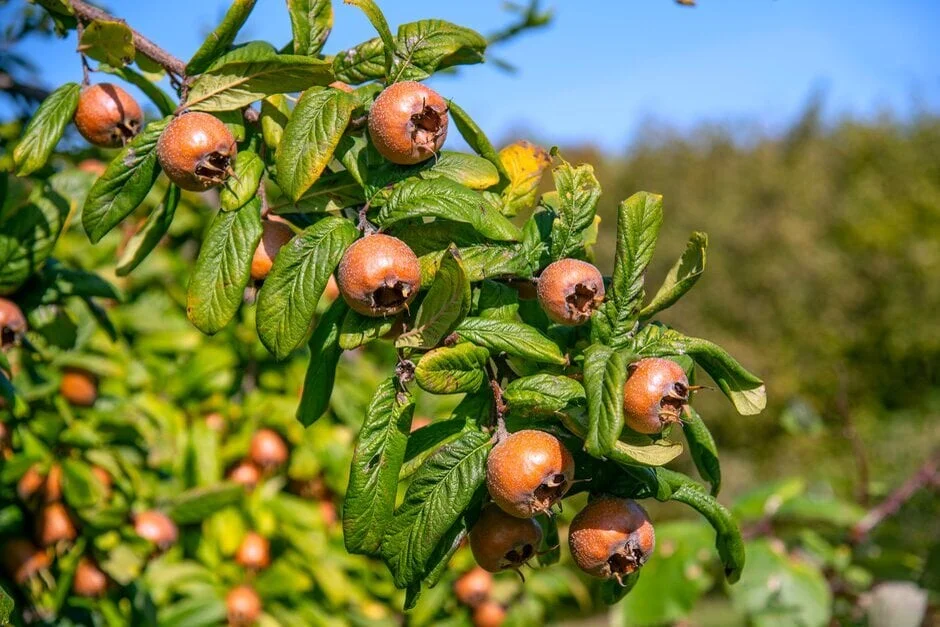
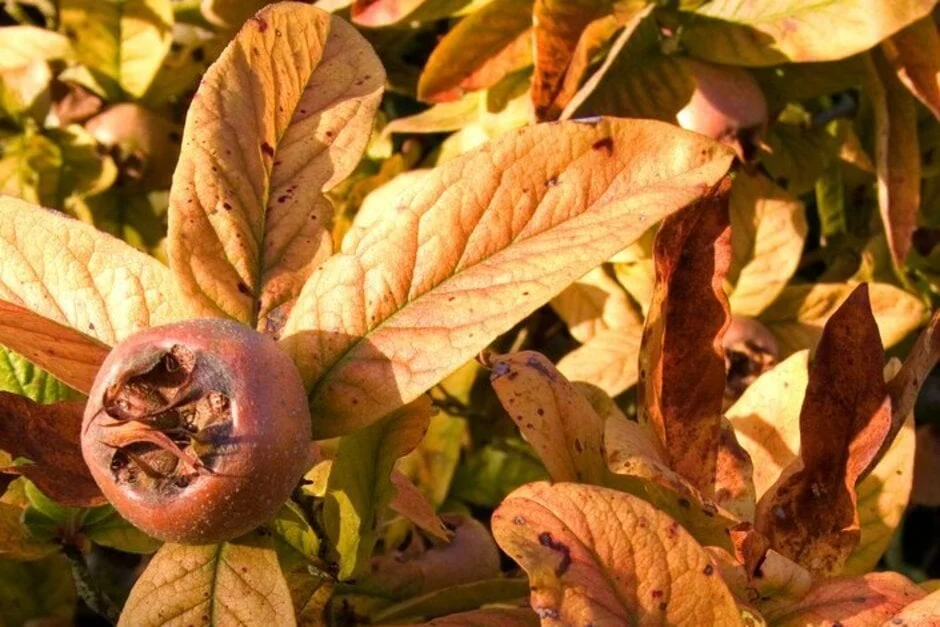
Medlar trees (Mespilus germanica) are easy to grow, productive, generally problem-free and need little pruning. They produce large white flowers in late spring, which attract bees and other pollinators. These are followed by small rounded fruits about 5cm (2in) across. Fruits are harvested in October and November, when the leaves typically display good autumn colour.
Medlar fruits are a curious delicacy, popular in medieval times but now rarely grown. Harvested in autumn when usually still hard, bitter and unripe, the small brown fruits need to be stored for several weeks to ripen (blet) until they are dark brown, soft, sweet and aromatic. The fruit can then either be eaten or used to make fragrant amber jelly or sweet desserts. Medlar fruits are very rarely available to buy, although you may sometimes find medlar jelly, so the best way to enjoy these unusual fruits is to grow your own.
Jobs to do now
Water young trees if needed
Month by Month
Plant
Harvest


Choosing What To Grow
The common medlar (Mespilus germanica) forms a broad tree reaching about 6m (20ft) tall and wide. There are also several varieties, which usually form smaller trees or produce larger or better flavoured fruits. You only need one tree for a good crop, as they are self-pollinating. Most medlar trees are sold grafted onto either hawthorn or quince roots, to keep them more compact – grafted medlar trees eventually reach 4–6m (13–20ft) tall and wide. Two common medlar rootstocks are ‘Quince A’, which is semi-vigorous, and ‘Quince C’, which is dwarfing.
When choosing any fruit trees, look in particular for varieties with an RHS Award of Garden Merit (AGM), which shows they performed well in trials, so should grow and crop reliably – see our list of AGM fruit and veg (135kB pdf) and our Recommended Varieties below. You can also see many productive fruit trees in RHS gardens, so do visit to see how they are grown, compare the varieties and pick up useful tips.
What and where to buy
Medlar trees aren’t widely available in garden centres, but specialist fruit nurseries and online fruit tree suppliers should stock several varieties. Choose a grafted tree on a dwarfing, semi-dwarfing or semi-vigorous rootstock, unless you have plenty of space. Medlars are sold as young trees, ready for planting, in two forms:
- trees – only available while dormant, from late autumn to early spring, for immediate planting, and generally cheaper than trees in pots
- Container-grown trees – available all year round for planting at any time, but winter is preferable
When buying a tree, look for well-balanced branches with a strong central shoot (leader). Also check the roots and avoid plants.
Recommended Varieties


'Nottingham'
Small fruits with a good flavour. Prolific harvests, on a fairly compact tree.
Planting
The best time to plant medlar trees is while they’re dormant, from late autumn to early spring. Container-grown trees can be planted at other times, but avoid planting in hot, dry weather. Medlars grow best in deep, fertile, well-drained soil, although they’re happy in most soil types except very chalky or poorly drained soils. They prefer full sun but will still crop in partial shade. The leaves and flowers are easily damaged by strong winds and late frosts, so choose a warm, sheltered planting spot. Medlar trees form a wide canopy, so position them at least 5m (16½ft) from other trees or buildings.
No soil preparation is generally needed before planting. However, if your soil is poor, dig a bucketful of organic matter, such as garden compost, into the soil you remove from your planting hole and use this to backfill after planting. This minimises soil disturbance and helps your tree get off to a strong start.
Prepare your tree for planting by giving it a thorough watering if it’s in a pot or by standing it in a bucket of water for half an hour if it’s a tree. If planting in a lawn, remove a circle of grass at least 1m (3¼ft) in diameter, so the tree’s roots don’t have to compete with the grass for rainwater and while they get established. You’ll find lots of advice in our planting guides below.
Staking
At planting time, insert a sturdy stake to help your tree root firmly into the soil. Most young trees just need a short, angled stake.
Plant Care
Medlar trees need little maintenance once established but some basic care can help to keep your tree healthy and give you a good crop of fruit.
Watering
Newly planted medlar trees should be watered regularly during dry spells in their first . For the next couple of years, water young trees during prolonged dry spells. Once established, trees grown in suitable soil shouldn't need any additional watering.
Mulching
In late winter or early spring, spread a 5-7.5cm (2-3in) layer of , such as garden , around the tree. Mulching will improve your soil, help to retain moisture and suppress weeds. Mulch can cause rotting if it’s piled up against a tree trunk, so leave a slight gap around the base of your tree.
Feeding
Medlar trees growing in regularly mulched soil shouldn't need any additional feeding. However, if harvests are particularly poor, or your tree is showing signs of nutrient deficiency, apply a granular fertiliser to the soil in early spring. Use our page on nutrient deficiencies to work out what is lacking and apply the recommended feed, following instructions on the packet.
Propagating
Commercially, named varieties of medlars are usually grafted onto quince or hawthorn roots, to limit their size. These are skilled processes but can be fun to try.
It is also possible to grow medlars from seed, particularly the common medlar, Mespilus germanica, but they can be slow to germinate and grow. Seeds from named varieties may produce variable results – often larger trees with lower quality fruit than the parent plant. There are risks associated with growing from the seed of supermarket-bought fruit, so this should be avoided.
Pruning And Training
Prune medlar trees in the winter months when they are dormant. The three main forms to chose from when pruning a young medlar tree are:
- Bush form – a tree with a clear trunk 70–90cm (2½–3ft) long, suitable for medlars grown on a dwarfing rootstock
- Half-standard – with a slightly longer clear trunk of 1.2–1.5m (4–5ft), suitable for medlars on a semi-vigorous or semi-dwarfing rootstock
- Standard – with an even longer clear trunk of 1.8–2.1m (6–7ft), suitable for a large medlar tree
Prune young medlar trees as you would young apple and pear trees, see our guide below. If you get your tree into a good shape early on, then only minimal pruning will be needed in future years. Aim to create an open-centred, goblet-shaped canopy.
Established medlar trees can be pruned in winter if required. This usually just involves removing any congested, dead or damaged shoots to keep the canopy open, and shortening any overly long branches so they don’t droop. Medlars are tip-bearers, meaning they fruit on the ends of small side-shoots, so take care not to remove these. Also, as these trees are usually grafted, remove any suckers or shoots that sprout from below the graft point at the base of the trunk.
Harvesting
Harvest medlar fruit in late October or November, after they’ve been exposed to frost. They will still be unripe, hard and bitter, so not yet ready for eating. They will rarely ripen on the tree in the UK. Harvest in dry conditions when the stalk detaches easily from the tree.
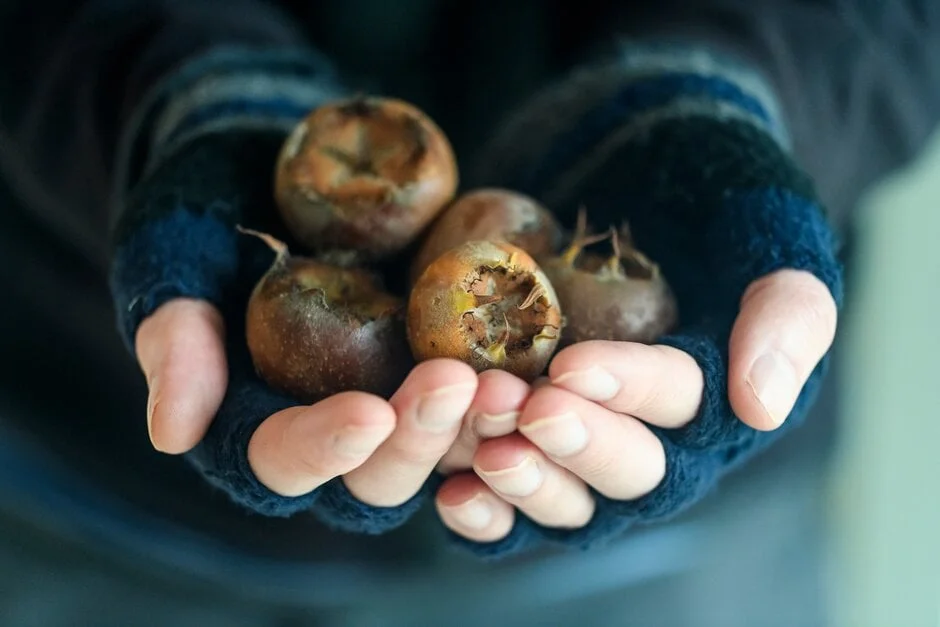
Before eating or cooking medlar fruits, they must be ‘bletted’ or allowed to ripen in storage, to make them soft and sweet. During bletting, the starches turn to sugars, and the acids and tannins decrease – and while this improves the flavour, it also makes the fruits look unappealingly brown and rotten, which may explain why they’re no longer widely grown or harvested. But this process is not rotting, it is ripening – the fruits should be sweet, juicy and aromatic.
To blet your medlars, lay the fruits out on trays, ideally in a cool, dark, frost-free, well-ventilated place, such as a garage. Medlars have traditionally been bletted on straw, hay or wooden trays, but you can also use newspaper, cardboard, kitchen roll or cloth. Make sure the fruits aren’t touching and their stalks face upward. After two or three weeks, they will become soft, darker brown and slightly wrinkled. Check them regularly and use as soon as they’re suitably succulent, sweet and aromatic. The leathery skin is not edible, so just scoop out the soft flesh and remove the large seeds.
Although not usually necessary, briefly dipping the stalks in a strong salt solution before laying the fruits on trays is sometimes recommended to help prevent rotting.
Bletted medlars are traditionally used to make a fragrant, amber-coloured jelly. They can also be used in sweet desserts, or even eaten uncooked, typically with cheese and port.
Problem Solving
Medlar trees are fully hardy in the UK and usually healthy and easy to grow. If cropping is poor, this could be due to late frosts or spring storms damaging the blossom and deterring pollinators. Lack of water can also cause young fruits to be shed. Mulching annually will help soil retain moisture. Avoid planting in shallow, poor soil.
Common Problems


Powdery mildews
Powdery mildews are a group of related fungi which attack a wide range of plants, causing a white, dusty coating on leaves, stems and flowers.

Quince leaf blight
Quince leaf blight is caused by the fungus Diplocarpon mespili. In wet seasons it can cause severe leaf spotting and premature leaf fall, whilst fruit...
